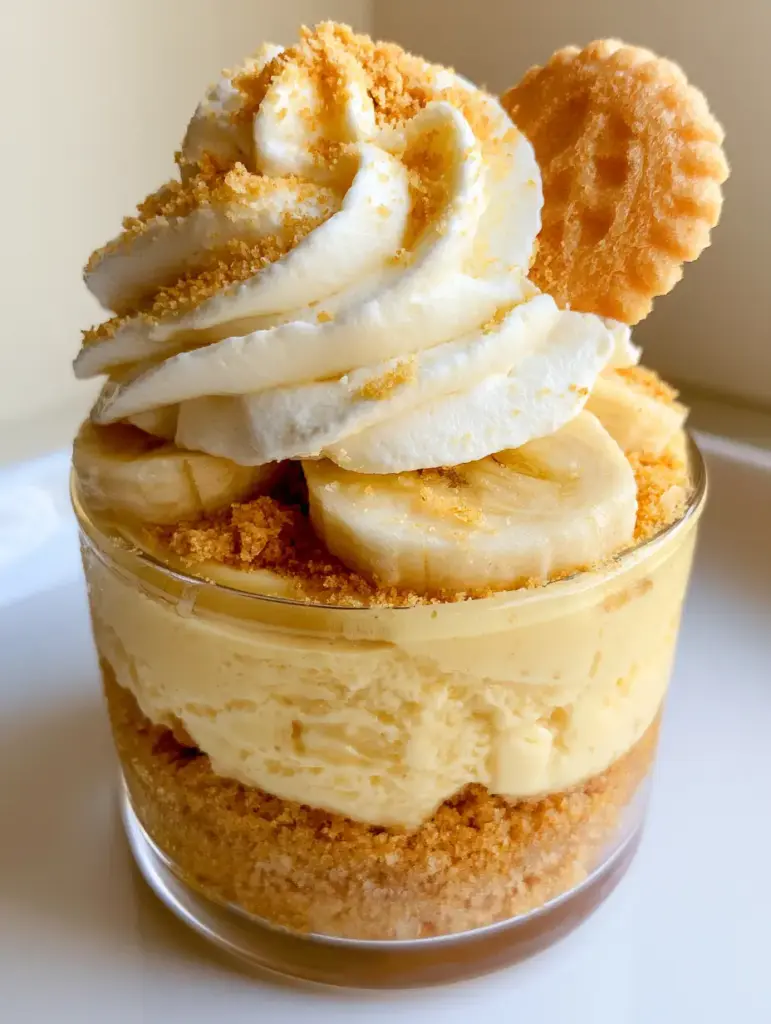
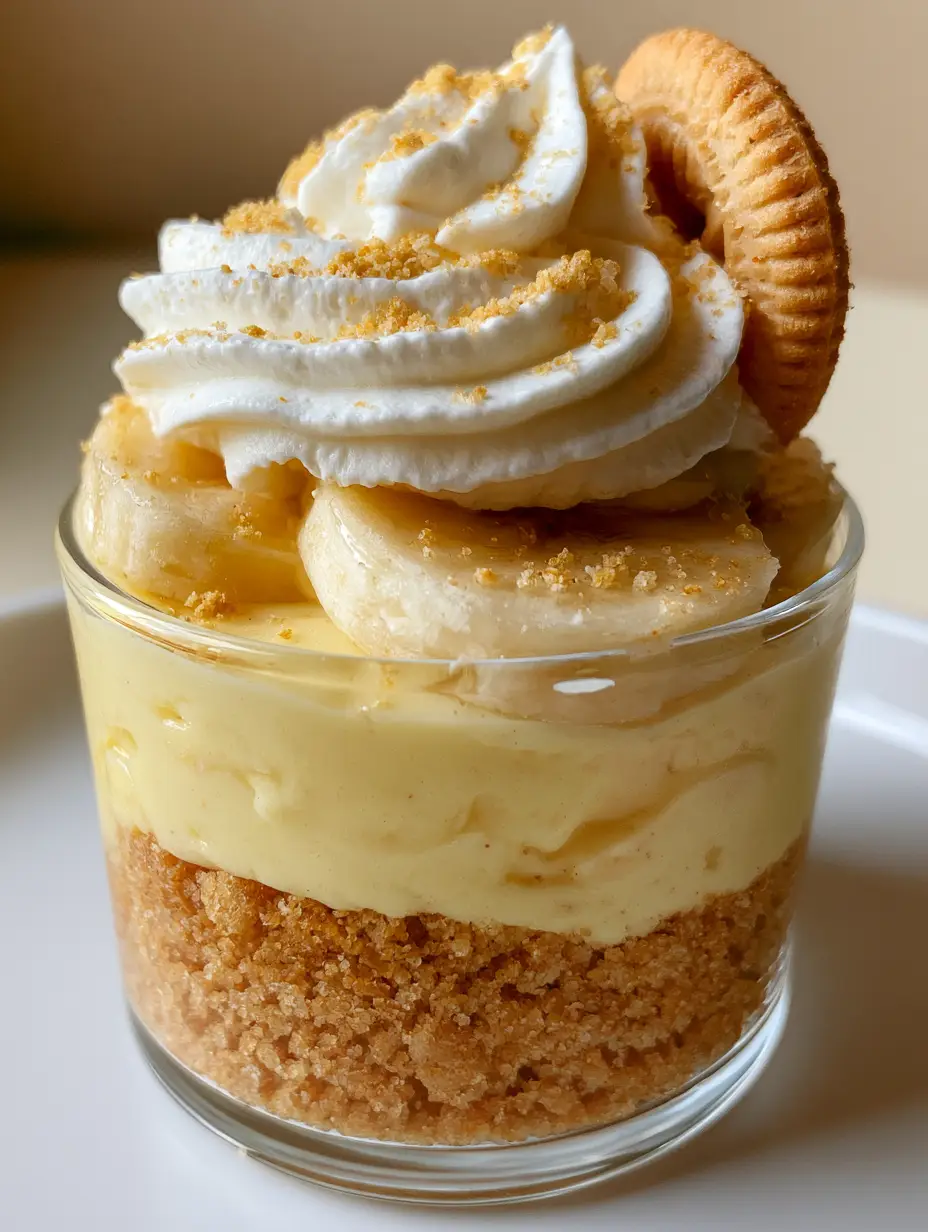
There is something inherently nostalgic about the combination of creamy banana pudding and buttery vanilla wafers. But when you transform those classic flavors into these elegant Mini Banana Pudding Cheesecakes, you elevate a backyard staple into a sophisticated, gourmet treat. Served in petite glass dessert cups, these treats showcase stunning vertical layers that are as visually captivating as they are delicious.
Imagine diving your spoon through a crown of stiff, airy whipped cream and a ring of fresh banana slices, only to hit a velvety, pale yellow banana cream filling. Below that lies the foundation: a thick, golden-brown crust made from buttery crushed vanilla wafers. It is the perfect balance of textures, from the crunch of the cookie to the silkiness of the cheesecake.
Whether you are hosting a summer soirée or looking for the perfect individual dessert for a family gathering, these Mini Banana Pudding Cheesecakes deliver. They offer the comfort of a classic banana pudding with the structural integrity and richness of a premium cheesecake. Let’s explore how to master this handheld masterpiece.
Why You Will Crave These Individual Banana Delights
- Perfectly Portioned Elegance: Serving these in clear petite glasses creates a beautiful visual display of the golden-brown crust and pale yellow filling, making them ideal for parties.
- Architectural Texture: The contrast between the stiff white whipped cream swirl and the velvety banana cream cheesecake provides a professional mouthfeel in every bite.
- Triple Vanilla Wafer Impact: We use the wafers three ways: as a compressed buttery base, a whole mini cookie garnish, and a fine golden dust for a professional finish.
- Visual Precision: By following our layering technique, you achieve the exact “handheld photo” quality seen in high-end culinary magazines.
The Anatomy of a Perfect Banana Cheesecake Layer
Creating a dessert that looks this good requires understanding the role of every ingredient. While the flavor is paramount, the structural stability of the cheesecake filling ensures those distinct vertical layers stay sharp and defined in the glass.
Vanilla Wafer Cookies: You will need 2 cups (approx. 200g) of crushed wafers for the base. These provide the essential golden-brown hue and a sweet, toasted flavor that balances the creamy filling.
Unsalted Butter: 6 tbsp (85g) of melted butter acts as the “glue” for your crust. It ensures the base is firm enough to support the filling without becoming greasy.
Full-Fat Cream Cheese: Use 16 oz (450g) of softened cream cheese. This is the structural heart of the Mini Banana Pudding Cheesecakes, providing the “velvety” texture mentioned in the visual blueprint.
Instant Banana Pudding Mix: 1 small box (3.4 oz / 96g) gives us that specific “pale yellow” color and concentrated banana flavor without adding too much moisture. It works as a stabilizer for the no-bake cheesecake base.
Whole Milk: 1/2 cup (120ml) is used to hydrate the pudding mix before incorporating it into the cream cheese, ensuring no grainy lumps remain.
Heavy Whipping Cream: 1.5 cups (360ml) will be divided. Part is folded into the filling for lightness, and the rest is whipped into a “stiff white swirl” for the crown.
Fresh Ripe Bananas: You will need 2 large bananas. One will be mashed into the filling for authentic flavor, and the other sliced into rings for the decorative top layer.
Confectioners’ Sugar: 1/4 cup (30g) stabilizes the whipped cream topping, ensuring it remains “stiff” and holds its shape even at room temperature.
Mini Vanilla Wafers: These are the final touch. One whole mini cookie tucked into the side of the cream provides a playful, iconic look.
Essential Tools for a Professional Presentation
To achieve the handheld smartphone photo aesthetic, you need the right vessels. I recommend using 5-ounce (150ml) clear glass dessert cups or mini mason jars to showcase the vertical layering.
A high-speed blender or food processor is necessary to achieve the “fine golden cookie dust” for the final garnish. For the whipped cream, a chilled metal bowl and a whisk attachment on a stand mixer are non-negotiable for achieving those stiff, architectural peaks.
Mastering the Layered Construction
Crafting the Buttery Wafer Foundation
Start by pulsing your vanilla wafers in a food processor until they reach the consistency of coarse sand. Transfer the crumbs to a bowl and stir in the melted butter and a pinch of salt until the mixture resembles wet sand.
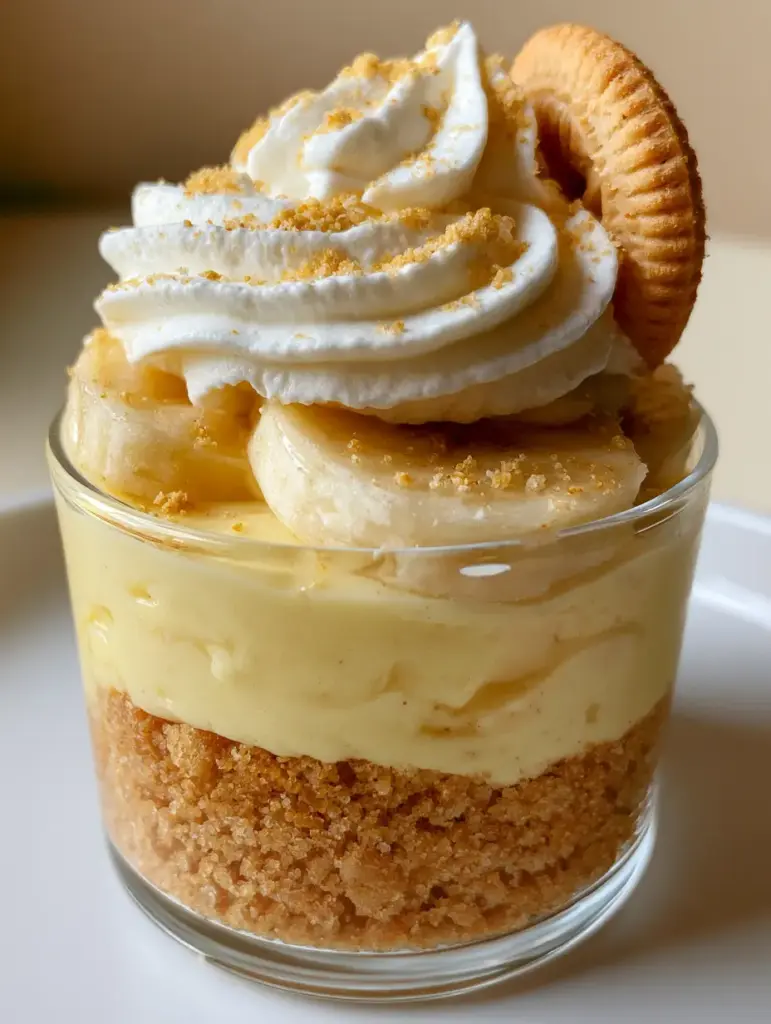
Spoon approximately 2 tablespoons (30g) of the mixture into each glass. Use a small tamper or the back of a spoon to press the crumbs into a firm, even “thick base of golden-brown buttery crushed vanilla wafer crumbs.”
Developing the Velvety Banana Filling
In a large bowl, beat the softened cream cheese until it is completely smooth and free of lumps. In a separate small bowl, whisk the banana pudding mix with the milk for 2 minutes until thickened, then fold this into the cream cheese.
Fold in one finely mashed banana. In another bowl, whip 1/2 cup (120ml) of heavy cream until stiff peaks form, then gently fold this into the banana mixture. This creates the “deep middle layer of velvety pale yellow banana cream cheesecake filling.”
The Assembly and Chilling Process
Pipe or spoon the filling over the crust, filling the glasses about 3/4 of the way up. Smooth the tops with a small spatula. Place the cups in the refrigerator for at least 3 hours to allow the cheesecake to set into its “thick” state.
Executing the Final Visual Details
Just before serving, slice your remaining banana into even rounds. Place a “ring of fresh ripe banana slices” directly onto the chilled cheesecake filling, pressing slightly so they stay in place.
Whip the remaining heavy cream with confectioners’ sugar until very stiff. Use a star tip and a piping bag to create a “generous swirl of stiff white whipped cream” in the center of the banana ring.
Finish by tucking “one whole mini vanilla wafer cookie” into the side of the cream swirl. Sprinkle a “light dusting of fine golden cookie dust” over the entire top to catch the light.
Expert Tips for Bakery-Quality Results
- Prevent Banana Browning: Lightly toss your banana slices in a splash of lemon juice before placing them on the cheesecake to keep them looking fresh and bright for hours.
- Room Temperature Ingredients: Ensure your cream cheese is truly at room temperature. Cold cream cheese will result in a lumpy filling that ruins the “velvety” visual requirement.
- The “Dusting” Technique: For the finest cookie dust, use a fine-mesh sieve to sprinkle the crumbs over the whipped cream. This prevents large chunks from weighing down the peaks.
- Chilling is Key: Do not rush the setting time. The pudding and cream cheese need time to bond to create that “deep middle layer” that doesn’t collapse when the spoon enters.
Storage and Make-Ahead Advice
These Mini Banana Pudding Cheesecakes are excellent for entertaining because they can be prepared in advance. You can make the crust and the cheesecake filling up to 24 hours ahead of time. Keep them tightly covered with plastic wrap in the refrigerator.
However, wait to add the fresh banana slices, whipped cream, and whole mini wafer until the day of serving. The bananas can oxidize, and the wafer cookie will lose its crunch if left in the moisture of the fridge for too long. These do not freeze well due to the dairy content and the fresh fruit.
What to Serve With These Creamy Treats
If you are planning a full menu, these cheesecakes are a fantastic follow-up to summer dinner recipes like grilled chicken or light pasta. For a dessert table spread, they pair beautifully with chocolate chip oatmeal cookie bars or even peach cobbler cookies for a Southern-inspired theme.
If you enjoy a bit of heat before your sweet, consider serving some alabama firecrackers as an appetizer to wake up the palate before the cooling banana cream takes over.
Frequently Asked Questions
Yes, you can substitute the pudding mix with a homemade banana custard or extra cream cheese and banana extract, though the instant mix provides the specific texture and pale yellow color characteristic of classic banana pudding.
Ensure the melted butter is thoroughly mixed with the crumbs to create a moisture barrier, and don’t add the filling until the crust has had a few minutes to set in the fridge.
The cheesecake filling stays fresh for up to 3 days, but for the best visual appeal and texture, add the fresh banana slices and whipped cream just before serving.
You likely need to whip the cream longer to reach stiff peaks, and ensure you use confectioners’ sugar (which contains cornstarch) to help stabilize the structure.
Mini Banana Pudding Cheesecakes Recipe Card
Mini Banana Pudding Cheesecakes: The Ultimate Individual Dessert Recipe
Ingredients
Equipment
Method
- Mix crushed vanilla wafers, melted butter, and salt until it reaches a wet sand consistency.
- Divide the mixture between 8 glasses and press down firmly to create a thick, even base.
- Whisk pudding mix and milk together for 2 minutes. Let sit until thickened.
- Beat softened cream cheese until smooth, then incorporate the pudding mixture and mashed banana.
- Whip 1/2 cup heavy cream to stiff peaks and gently fold into the banana mixture until velvety and pale yellow.
- Pipe the filling over the crusts and refrigerate for at least 3 hours.
- Place fresh banana slices in a ring on top of the chilled filling.
- Whip remaining cream and sugar to very stiff peaks; pipe a generous swirl in the center.
- Tuck one mini wafer into the side of the cream and dust with fine cookie crumbs.
Notes
Ensure cream cheese is room temperature to avoid lumps in the velvety filling.
The Final Word on Individual Cheesecakes
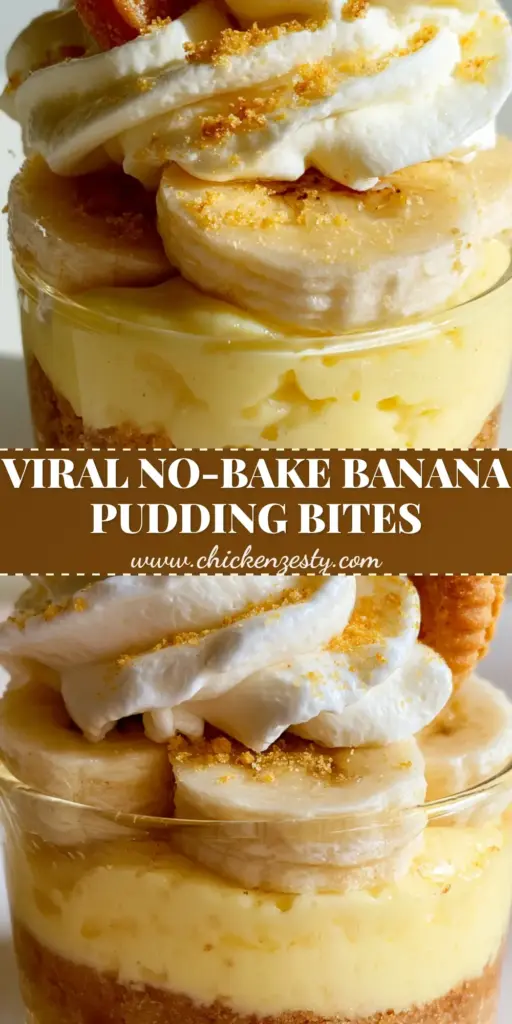
These Mini Banana Pudding Cheesecakes represent the pinnacle of easy yet impressive dessert crafting. By focusing on the vertical layers and the contrast of textures—from the buttery wafer crust to the stiff whipped cream—you create a sensory experience that far exceeds the effort required. They are a testament to how classic flavors can be reimagined with professional flair.
We would love to see your creations! If you make these, please leave a comment below and share your photos. Don’t forget to follow us on Pinterest for more visually stunning recipe inspiration.