There is something universally comforting about the scent of roasting garlic and melting butter wafting through a kitchen. These garlic snacks represent the pinnacle of savory indulgence, combining the rustic charm of a cast iron skillet with the technical precision of a perfectly proofed dough.
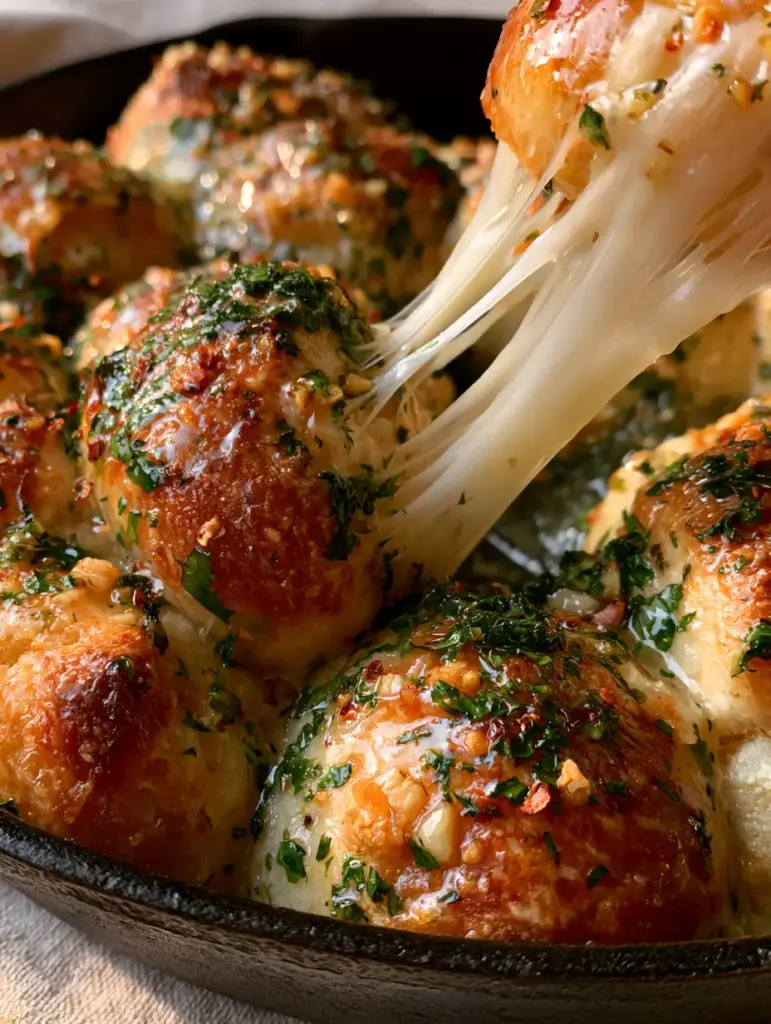
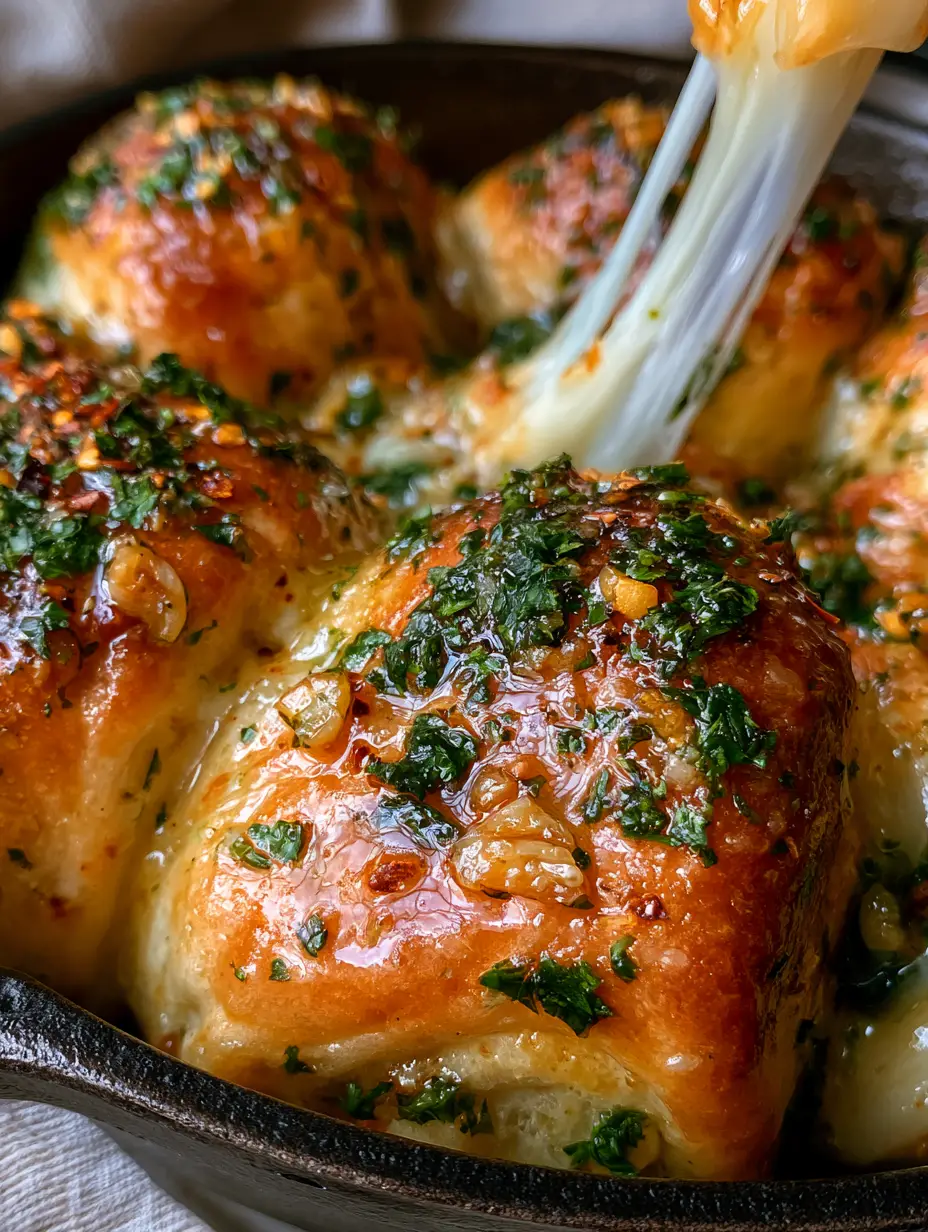
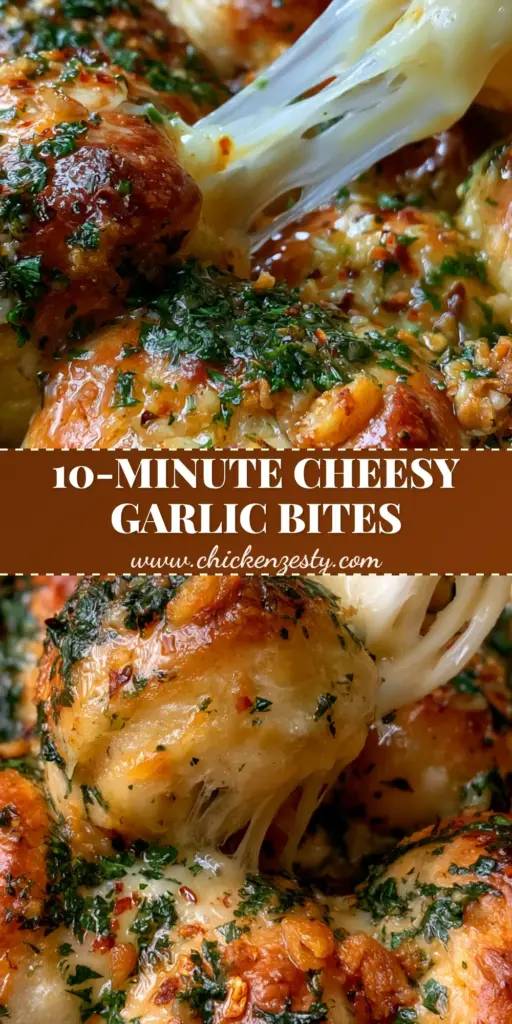
When you pull these bites apart, you are greeted by an ethereal stretch of translucent mozzarella cheese that defies gravity. The exterior of each dough ball is baked to a deep, resonant golden-brown, offering a satisfying crunch that gives way to a cloud-like interior.
Whether you are hosting a game day gathering or looking for the perfect side dish for a cozy family dinner, these garlic snacks are designed to be the centerpiece. Every element, from the glossy sheen of the butter to the tiny bits of toasted garlic, has been crafted to satisfy both the eyes and the palate.
Why These Garlic Snacks Are a Total Game Changer
Achieving the perfect appetizer requires a balance of texture, visual appeal, and high-impact flavor. These bread bites deliver on all fronts, providing a sensory experience that goes far beyond your standard dinner roll.
- The Legendary Cheese Pull: By using high-quality, low-moisture mozzarella, we achieve those thick, translucent strands of cheese seen in professional culinary photography.
- The Skillet Advantage: Using a seasoned cast iron skillet ensures even heat distribution, resulting in a crispy, well-developed bottom crust and a beautiful “nestled” appearance.
- Triple Garlic Impact: We utilize fresh minced garlic that is partially sautéed to a golden brown, ensuring deep nutty notes without any raw bitterness.
- Visual Vibrancy: The contrast of emerald-green parsley against the crimson red pepper flakes and the glistening butter makes this dish look like it jumped off a gourmet magazine cover.
Essential Pantry Items for Golden-Brown Skillet Bites
Every ingredient in this recipe serves a specific structural or flavor-based purpose. To achieve the results seen in the visual blueprint, high-quality fats and fresh aromatics are non-negotiable.
All-Purpose Flour: 3 ½ cups (435g). This provides the necessary protein structure to support the heavy mozzarella center while remaining tender after baking.
Active Dry Yeast: 2 ¼ tsp (7g). The engine of our dough, yeast creates the carbon dioxide bubbles that result in a light, airy “pull-apart” texture.
Warm Water: 1 cup (240ml). Essential for hydrating the flour and blooming the yeast; it must be between 105°F and 115°F (40°C-46°C) to ensure the yeast remains active.
Granulated Sugar: 1 tbsp (12g). A small amount of sugar feeds the yeast and aids in the Maillard reaction, helping us achieve that signature golden-brown exterior.
Unsalted Butter: ½ cup (115g). We use melted butter both in the dough for richness and as a glossy glaze to create that “wet sheen” on the finished bites.
Low-Moisture Mozzarella: 8 oz (225g). Cutting the cheese into cubes rather than shredding it ensures a concentrated “molten” core that creates the mid-air stretch.
Fresh Garlic: 6 cloves (30g). Half is sautéed for toasted flavor, while the other half remains fresh in the butter glaze for a sharp, aromatic punch.
Fresh Parsley: ¼ cup (15g). Finely minced parsley adds a necessary herbaceous brightness and the “emerald-green” visual contrast required for the blueprint.
Crushed Red Pepper Flakes: 1 tsp (2g). These provide a subtle background heat and a pop of red color that cuts through the richness of the butter.
Coarse Sea Salt: 1 tsp (6g). Sprinkled at the very end, these large crystals provide a sparkling highlight and a burst of seasoning in every bite.
The Right Tools for the Perfect Pull-Apart Stretch
To recreate the rustic aesthetic of this recipe, your choice of cookware is paramount. While a baking sheet works, it will not provide the same heat retention or presentation value.
10-inch (25cm) Cast Iron Skillet: This is the star of the show. A well-seasoned skillet provides a naturally non-stick surface and creates a superior crust compared to glass or ceramic.
Stand Mixer with Dough Hook: While you can knead by hand, a stand mixer ensures the dough is perfectly elastic and smooth, which is vital for holding the cheese inside without leaking.
Digital Kitchen Scale: For consistent results, weighing your flour and cheese ensures the ratio of dough to filling is always perfect.
Pastry Brush: A silicone or natural bristle brush is necessary to apply the garlic butter glaze evenly, ensuring every crevice of the dough balls is glistening.
Mastering the Art of Fluffy, Cheesy Garlic Bites
Phase 1: Developing the Perfect Yeast Dough
In the bowl of your stand mixer, combine the warm water, sugar, and yeast. Let it sit for 5-10 minutes until a foamy “bloom” appears on the surface, indicating the yeast is alive and ready.
Add the melted butter and flour. Use the dough hook on low speed until the flour is incorporated, then increase to medium and knead for 5-7 minutes. The dough should be smooth, slightly tacky, and pull away from the sides of the bowl.
Place the dough in a lightly oiled bowl, cover with a damp cloth, and let rise in a warm, draft-free spot for about 1 hour or until it has doubled in size. This slow rise is what creates the “cloud-like” interior of our garlic snacks.
Phase 2: Filling and Shaping the Bites
Punch down the risen dough to release excess air. Turn it out onto a lightly floured surface and divide it into 20-24 equal-sized pieces (about 30-35g each).
Flatten each piece into a small disc. Place a 1/2-inch cube of mozzarella in the center and pinch the edges of the dough together tightly to seal. Roll the ball between your palms to ensure it is perfectly round.
Arrange the balls in your seasoned cast iron skillet, starting from the outside and working your way in. They should be close together but not smashed; they will expand and “nestle” during the second rise and bake.
Phase 3: The Golden-Brown Bake
Cover the skillet and let the bites rise for another 20-30 minutes. Meanwhile, preheat your oven to 375°F (190°C).
Bake for 20-25 minutes. Look for the “visual cue” of a deep golden-brown exterior. The dough should sound slightly hollow when tapped, and the tops should have a matte, toasted appearance before the glaze is applied.
Phase 4: Creating the Glossy Garlic Butter Glaze
While the bites bake, melt the remaining butter in a small saucepan over medium heat. Add half of your minced garlic and sauté for 2-3 minutes until it turns into “tiny golden-brown bits.”
Remove from heat and stir in the remaining fresh garlic, finely minced parsley, and red pepper flakes. This combination of cooked and raw garlic creates a complex flavor profile that defines high-quality garlic snacks.
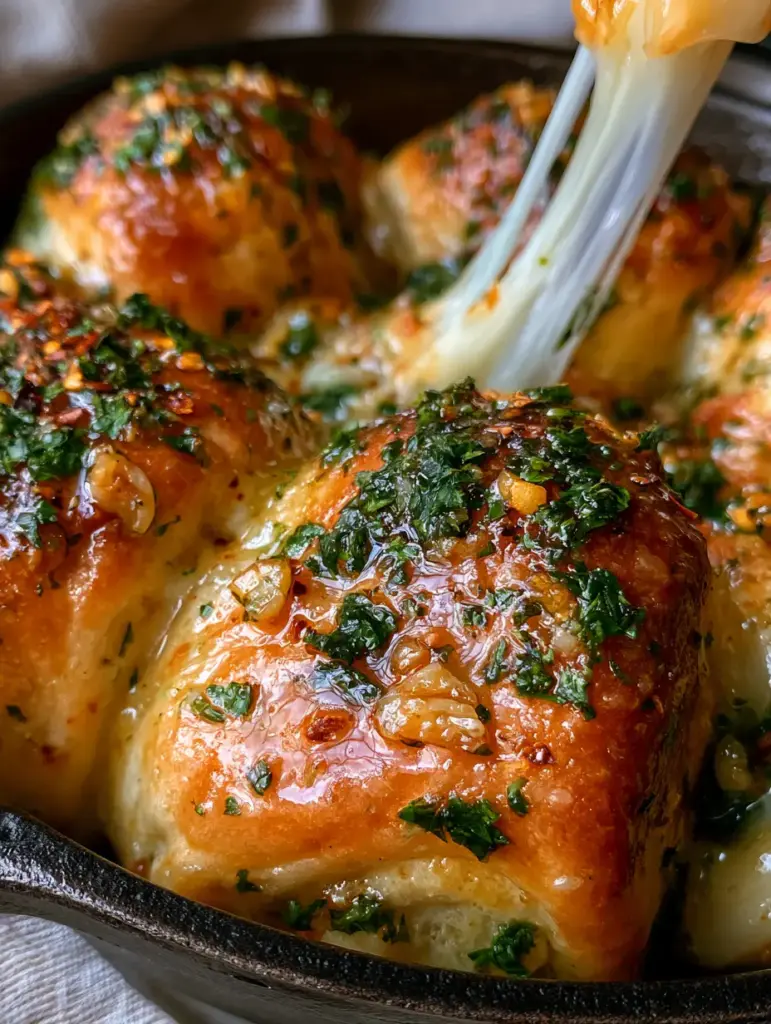
Immediately after removing the skillet from the oven, brush the warm glaze generously over the bread. The butter will soak into the crust, creating that “wet sheen” and “sparkling highlights” mentioned in our visual prompt.
Chef Secrets for a Professional Skillet Finish
To ensure your recipe looks exactly like the handheld smartphone photo in the blueprint, follow these professional tips for a “culinary forensic” finish.
- The Pinch Technique: If your cheese leaks out, it’s usually because of a weak seam. Ensure your hands are dry when pinching the dough to create a fuse-like seal.
- Natural Daylight Lighting: If you are taking photos, place your skillet near a window with “soft, diffused natural daylight” coming from the side to emphasize the textures of the butter and parsley.
- Temperature Control: If your garlic bits turn dark brown or black, they will be bitter. Sauté them on low heat just until they reach a light tan color; they will continue to “cook” in the hot butter.
- The Sea Salt Finish: Always apply the coarse sea salt after the butter glaze. If you add it before, the salt will dissolve into the dough rather than sitting on top as a crunchy, reflective garnish.
Preserving That Fresh-Out-of-the-Oven Magic
These garlic snacks are undeniably best served fresh, but you can maintain their quality with proper storage. Because of the high fat content in the butter, they reheat remarkably well.
Storage: Keep leftovers in an airtight container at room temperature for up to 2 days, or in the refrigerator for up to 5 days. For long-term storage, these can be frozen for up to 2 months.
Reheating: Avoid the microwave if possible, as it can make the dough rubbery. Instead, place the bites back in a skillet or on a baking sheet at 350°F (175°C) for 8-10 minutes until the cheese inside is once again molten and stretchy.
What to Dip Your Cheesy Bread Bites Into
While these bites are a complete meal on their own, they pair beautifully with other textured appetizers and savory mains. If you enjoy the flavor profile of these garlic snacks, you might also enjoy exploring our savory garlic butter pork for a high-protein pairing.
For those who love the combination of cheese and garlic, our crispy mozzarella bites offer a different textural experience with a breaded exterior. If you are looking for a lighter accompaniment, these bread bites contrast perfectly with a side of garlic dill cucumbers to cleanse the palate.
Finally, if you’re planning a full spread, consider serving these alongside classic roadhouse-style pork chops for a hearty, restaurant-quality dinner experience at home.
Answers to Your Most Common Garlic Bread Queries
Yes, you can substitute 1 lb (450g) of store-bought dough. However, homemade dough often provides a fluffier, more ‘cloud-like’ texture that better complements the heavy cheese filling.
Use high-quality, low-moisture mozzarella blocks cut into cubes rather than pre-shredded cheese. Pre-shredded cheese contains anti-caking agents like potato starch that inhibit a smooth, translucent stretch.
This usually happens if the dough is rolled too thin at the bottom or if the seam isn’t pinched tightly enough. Ensure you have an even thickness of dough around the cheese cube and seal it firmly with dry fingers.
This is often due to low oven temperature or skipping the sugar in the dough. Sugar aids the Maillard reaction, which creates that deep golden color. Ensure your oven is fully preheated to 375°F (190°C).
Garlic becomes bitter if it is burnt. Ensure you sauté the minced garlic over medium-low heat and remove it from the stove as soon as it turns light golden-brown; the residual heat will finish the cooking.
The Ultimate Cheesy Garlic Butter Skillet Bites Recipe
Garlic Snacks: The Ultimate Pull-Apart Cheesy Garlic Butter Bread
Ingredients
Equipment
Method
- Combine warm water, sugar, and yeast in a stand mixer bowl. Let stand for 5-10 minutes until foamy.
- Add half the melted butter and flour. Knead with the dough hook for 5-7 minutes until smooth and elastic.
- Place in an oiled bowl and let rise in a warm spot for 1 hour until doubled in size.
- Divide dough into 24 pieces. Flatten each, place a mozzarella cube in the center, and pinch tightly to seal.
- Arrange balls in a seasoned cast iron skillet. Cover and let rise for 20-30 minutes.
- Preheat oven to 375°F (190°C). Bake for 20-25 minutes until deep golden-brown.
- Sauté half the garlic in remaining melted butter until golden-brown. Stir in raw garlic, parsley, and chili flakes.
- Brush the hot glaze over the bread immediately after baking. Sprinkle with coarse sea salt.
Notes
Use a seasoned cast iron skillet for the best bottom crust texture.
Closing & Call to Action
Mastering these cheesy garlic snacks is a rite of passage for any home cook who loves bold flavors and satisfying textures. The combination of the crispy skillet-baked dough and the luxurious garlic butter glaze creates an irresistible snack that disappears in minutes.
Did you achieve that perfect mid-air cheese stretch? We want to see your results! Leave a comment below with your favorite dipping sauce pairings, and don’t forget to share your skillet photos with us on Pinterest. For more kitchen inspiration and snack-able content, sign up for our weekly newsletter!