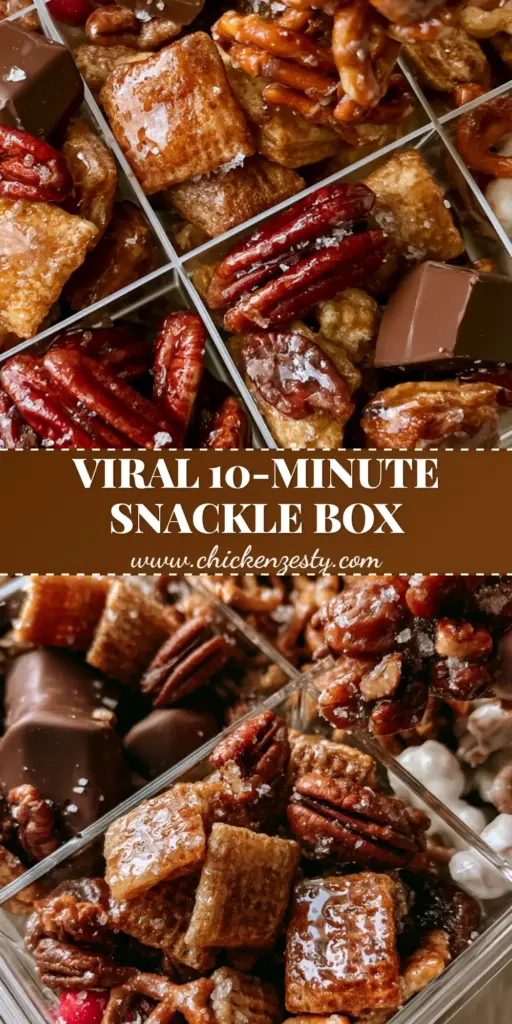
There is something inherently nostalgic about a snack mix, yet this version elevates the childhood classic into a gourmet experience. Imagine reaching into a clear acrylic box and finding a treasure trove of textures: golden-brown glazed waffle cereal squares, shiny honey-roasted pecans, and velvety dark chocolate chunks. This isn’t your standard bag of salty bits; it is a carefully orchestrated symphony of flavors designed to satisfy every craving.
The secret lies in the glistening sugar glaze that coats the base elements, providing a professional, high-gloss finish that looks as good as it tastes. Whether you are hosting a sophisticated cocktail hour or looking for the ultimate movie night companion, this recipe delivers a visual and sensory punch. The addition of vibrant red candy-coated chocolates and white chocolate-covered pretzels ensures every handful is a colorful surprise.
By following a few simple culinary techniques—like tempering the sweetness with flaky sea salt and ensuring a low-and-slow bake for the glaze—you can achieve a result that rivals high-end boutique confectioneries. This snack mix is designed to stay crunchy for days, making it the perfect make-ahead treat or DIY gift for any occasion.
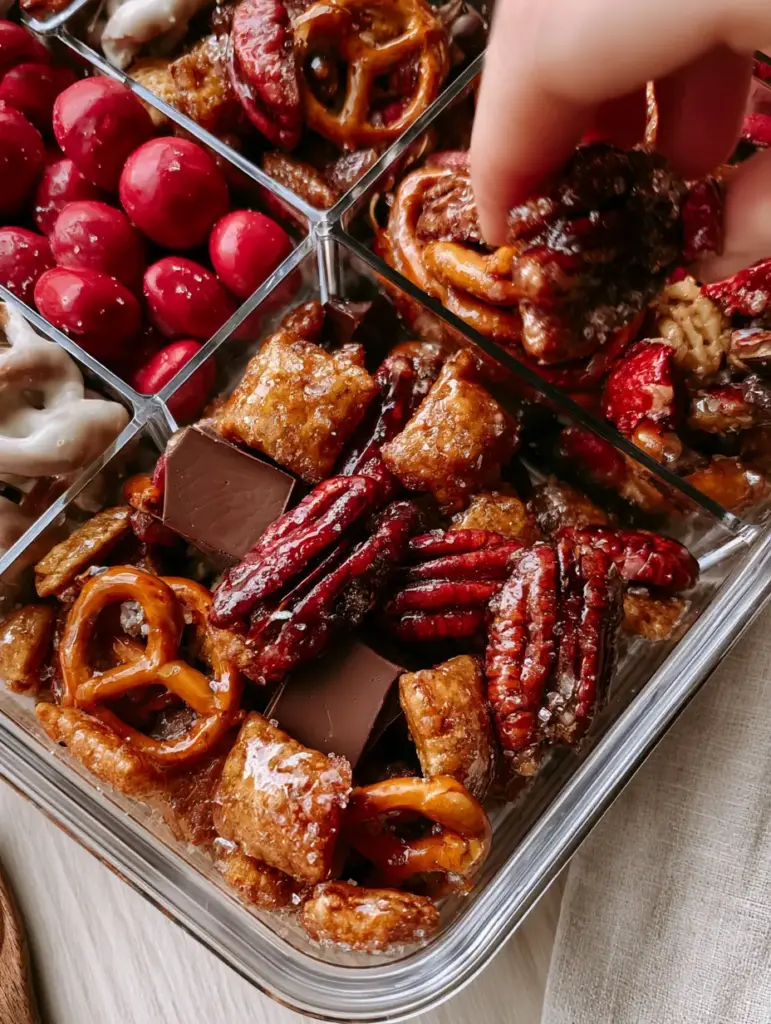
Why This Is the Ultimate Gourmet Sweet and Salty Crunch
- Multidimensional Textures: You get the airy crunch of waffle cereal, the snap of mini pretzels, and the buttery bite of roasted pecans in every bite.
- The Glistening Glaze: A specific ratio of honey and sugar creates a thin, reflective coating that doesn’t feel sticky to the touch once cooled.
- Visual Contrast: The matte finish of the dark chocolate chunks beautifully offsets the shiny glazed cereal and vibrant red candies.
- Perfectly Balanced Salt: We don’t just use standard table salt; visible grains of flaky sea salt provide bursts of savory flavor that cut through the honey glaze.
The Essential Elements for a Glistening Snack Mix
Every ingredient in this recipe serves a structural or flavor-based purpose. To achieve the specific look of our visual blueprint, we must be precise with our selections.
Honey-Glazed Waffle Cereal Squares: 6 cups (180g) of corn or rice waffle-style cereal provide the “scaffolding” for the mix. The grid-like structure of the cereal is perfect for trapping the glistening sugar glaze, ensuring a crunch that resonates.
Shiny Honey-Roasted Pecans: 1.5 cups (190g) of pecan halves are roasted directly with the cereal. The natural oils in the pecans emulsify with the honey to create a deep, toasted flavor and a glossy exterior.
Mini Salted Twist Pretzels: 2 cups (80g) of miniature pretzels add the necessary salt and structural rigidity. Their dark, baked exterior provides a beautiful color contrast to the golden cereal squares.
Dark Chocolate Chunks: 1 cup (170g) of high-quality dark chocolate (at least 60% cacao) offers a sophisticated bitterness. We use chunks rather than chips to ensure the “matte” visual remains prominent against the shiny glaze.
Red Candy-Coated Chocolates: 1/2 cup (100g) of vibrant red chocolates add a pop of primary color. These provide a smooth, thin-shell crunch that differs from the baked elements.
White Chocolate-Covered Pretzels: 1 cup (110g) of pre-coated white chocolate pretzels introduce a creamy, vanilla-forward profile. These are added at the very end to prevent the white chocolate from melting in the oven.
The Glistening Glaze Base: 1/2 cup (113g) of unsalted butter, 1/3 cup (80ml) of honey, and 1/4 cup (50g) of granulated sugar. This combination, when boiled briefly, creates the thin, syrup-like coating that dries into a glass-like finish.
Flaky Sea Salt: 1 tbsp (10g) of Maldon or similar sea salt flakes. These visible grains are the literal “cherry on top,” providing the essential “salty” in this sweet and salty snack mix.
Tools Required for Professional Results
To achieve the “lifestyle photo” look, you don’t need fancy equipment, but you do need the right tools for heat distribution. A large, heavy-duty rimmed baking sheet is non-negotiable to prevent the glaze from overflowing.
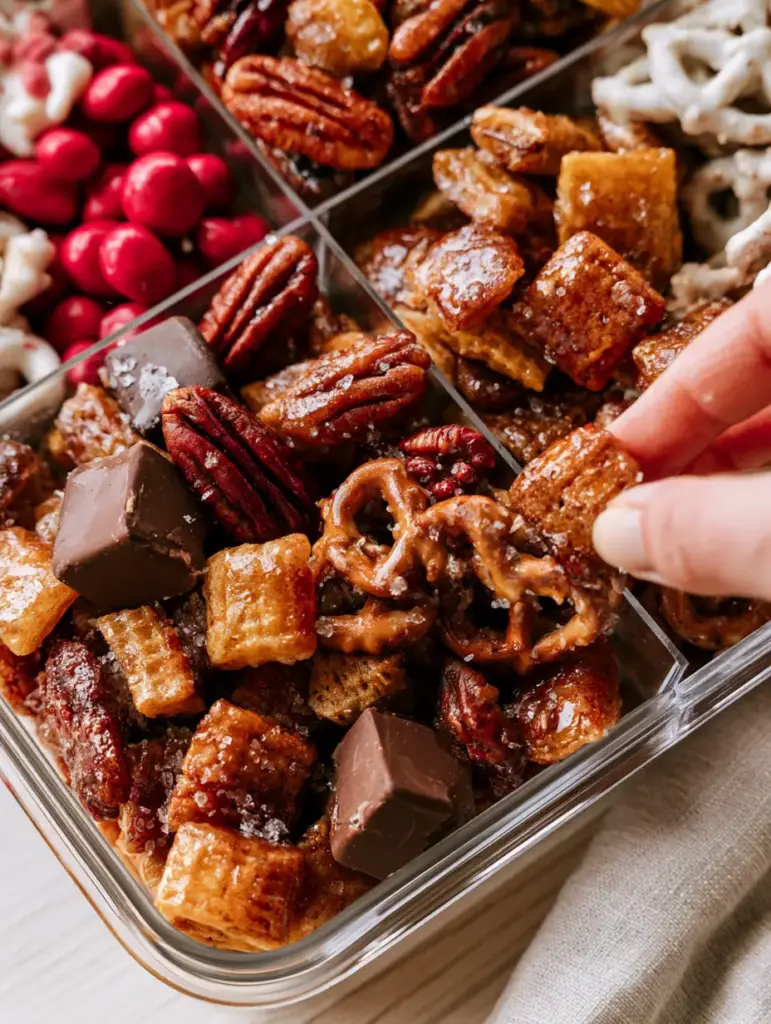
Parchment paper or a silicone baking mat is essential for ensuring the sugar glaze doesn’t stick to the pan. For the final presentation, a clear acrylic divided snack box allows the vibrant red candies and dark chocolate to stand out in their own compartments, much like the gourmet displays found in high-end boutiques.
Mastering the Glistening Honey Glaze Technique
Preparing the Crunchy Base
Preheat your oven to 300°F (150°C). This relatively low temperature is crucial; it allows the water in the glaze to evaporate without burning the sugars, which would result in a bitter taste rather than a sweet one.
In a massive mixing bowl, combine your waffle cereal, pecans, and mini salted pretzels. Toss them gently with your hands to ensure an even distribution of textures before the wet ingredients are introduced.
Simmering the Liquid Gold
In a small saucepan over medium heat, combine the butter, honey, and granulated sugar. Bring the mixture to a gentle boil, stirring constantly with a whisk for about 2 minutes.
You are looking for the mixture to become slightly foamy and pale gold. This indicates that the sugar has fully dissolved into the butter and honey, which is the secret to a glaze that doesn’t feel grainy on the tooth.
Coating and The First Bake
Drizzle the hot glaze over the cereal mixture. Use a large rubber spatula to fold the mix gently from the bottom up, ensuring every single square of cereal and every pecan nook is coated.
Spread the mixture onto your prepared baking sheet in a single, even layer. Bake for 20-25 minutes, stirring halfway through. Listen for a light “sizzling” sound—this is the moisture leaving the glaze, leaving behind that iconic glistening finish.
The Cooling and Finishing Phase
Remove the tray from the oven and immediately sprinkle the flaky sea salt over the hot mix. The heat will help the salt grains adhere to the tacky glaze before it sets into a hard shell.
Allow the mix to cool completely on the pan. This is the hardest part, but it is vital. If you add the dark chocolate chunks or red candies while the mix is warm, you will end up with a muddy, melted mess rather than the distinct, clean lines of a gourmet snack mix.
Final Assembly for Visual Impact
Once stone-cold, break up any large clusters. Gently fold in the dark chocolate chunks, the white chocolate-covered pretzels, and the red candy-coated chocolates. The contrast between the shiny glaze and the matte chocolate is now fully realized.
Expert Tips for Long-Lasting Crunch
- Avoid Humidity: Sugar is hygroscopic, meaning it pulls moisture from the air. Always store your mix in an airtight container the moment it reaches room temperature.
- The “Matte” Secret: To keep your dark chocolate chunks looking matte and professional, store the chocolate in the fridge for 10 minutes before adding it to the mix; this prevents any residual heat from the cereal from blooming the cocoa butter.
- Customizing the Heat: If you enjoy a spicy kick, a pinch of cayenne in the honey glaze pairs beautifully with the dark chocolate, much like a smoky snack mix profile.
- Nut Alternatives: If you don’t have pecans, cinnamon walnuts make an incredible substitution that complements the honey glaze perfectly.
Serving Suggestions and Pairings
This snack mix is the star of the show, but it also plays well with others. For a full “sweet and savory” spread, serve it alongside parmesan mozzarella bites or crispy feta rolls.
If you are looking for more no-bake options to round out a party table, check out our collection of no-bake snack mix recipes. For those who prefer a more savory garlic-forward profile, our garlic ritz snack is the perfect counterpoint to this honey-glazed version.
Storing Your Gourmet Creation
This mix can be stored in an airtight container at room temperature for up to two weeks. However, for the best visual appeal—maintaining that glistening glaze and those visible sea salt grains—it is best consumed within 5 days.
We do not recommend freezing this specific mix, as the condensation during the thawing process can cause the sugar glaze to become sticky and the pretzels to lose their characteristic snap.
Frequently Asked Questions
Absolutely. While pecans provide a buttery crunch, you can use walnuts, almonds, or even cashews. Just ensure they are raw before roasting so they can soak up the honey glaze in the oven.
The secret is the ratio of honey to sugar and butter. Boiling the mixture for 2 minutes before coating ensures the sugar is fully dissolved, which creates a smooth, reflective surface once baked and cooled.
While table salt provides saltiness, flaky sea salt (like Maldon) adds both a visual element and concentrated bursts of flavor that better balance the sweetness of the honey glaze.
Always wait until the glazed cereal and pretzels are completely cold. Adding chocolate to a warm mix will cause it to melt and bloom, ruining the distinct ‘matte’ look of the dark chocolate chunks.
Stickiness is usually caused by under-baking or high humidity. Ensure you bake the mix at 300°F until it sizzles slightly, and store it in an airtight container immediately once it has cooled to room temperature.
The Ultimate Honey Glazed Snack Mix Recipe
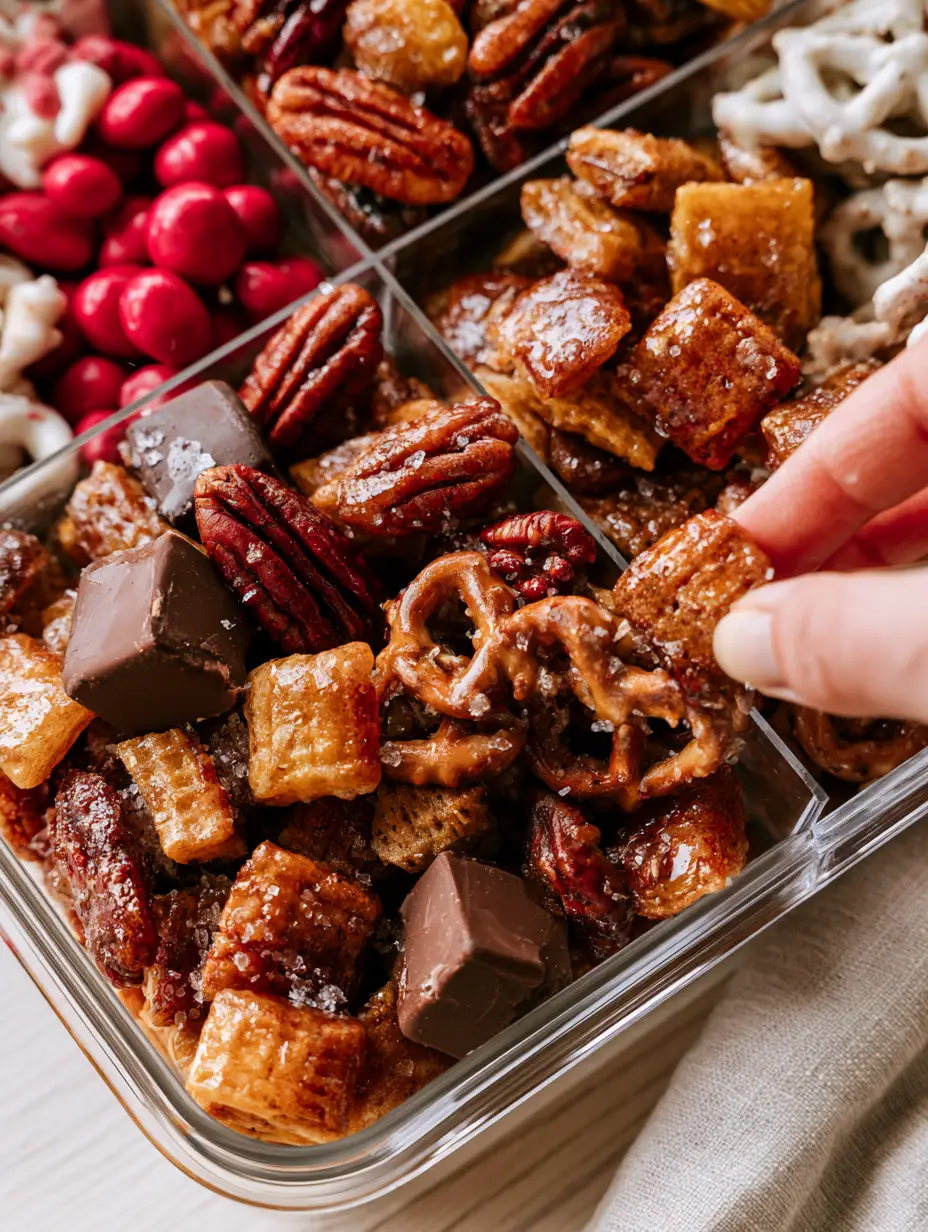
Snack Mix with Honey Glaze, Roasted Pecans, and Dark Chocolate Chunks
Ingredients
Equipment
Method
- Preheat oven to 300°F (150°C) and line a large baking sheet with parchment paper. Combine cereal, pecans, and mini pretzels in a large bowl.
- In a saucepan, simmer butter, honey, and sugar for 2 minutes until foamy and the sugar has fully dissolved.
- Drizzle glaze over the cereal mixture and toss until evenly coated. Spread on the baking sheet and bake for 20-25 minutes, stirring once.
- Immediately sprinkle with flaky sea salt while hot. Let the mix cool completely on the tray until the glaze is hard and glistening.
- Once stone-cold, gently stir in the dark chocolate chunks, red candies, and white chocolate pretzels. Store in an airtight container.
Notes
Use a low oven temperature (300°F) to ensure the honey glaze sets without burning.
Elevate Your Snacking Game Today
Creating a gourmet snack mix is as much about the visual presentation as it is about the flavor. By focusing on the “glisten” of the glaze and the quality of your chocolate, you turn a simple pantry staple into a luxury treat. We would love to see how your mix turns out! Be sure to leave a comment below and share your photos with us.
For more inspiration and to save this recipe for your next gathering, follow us on Pinterest. Happy snacking!