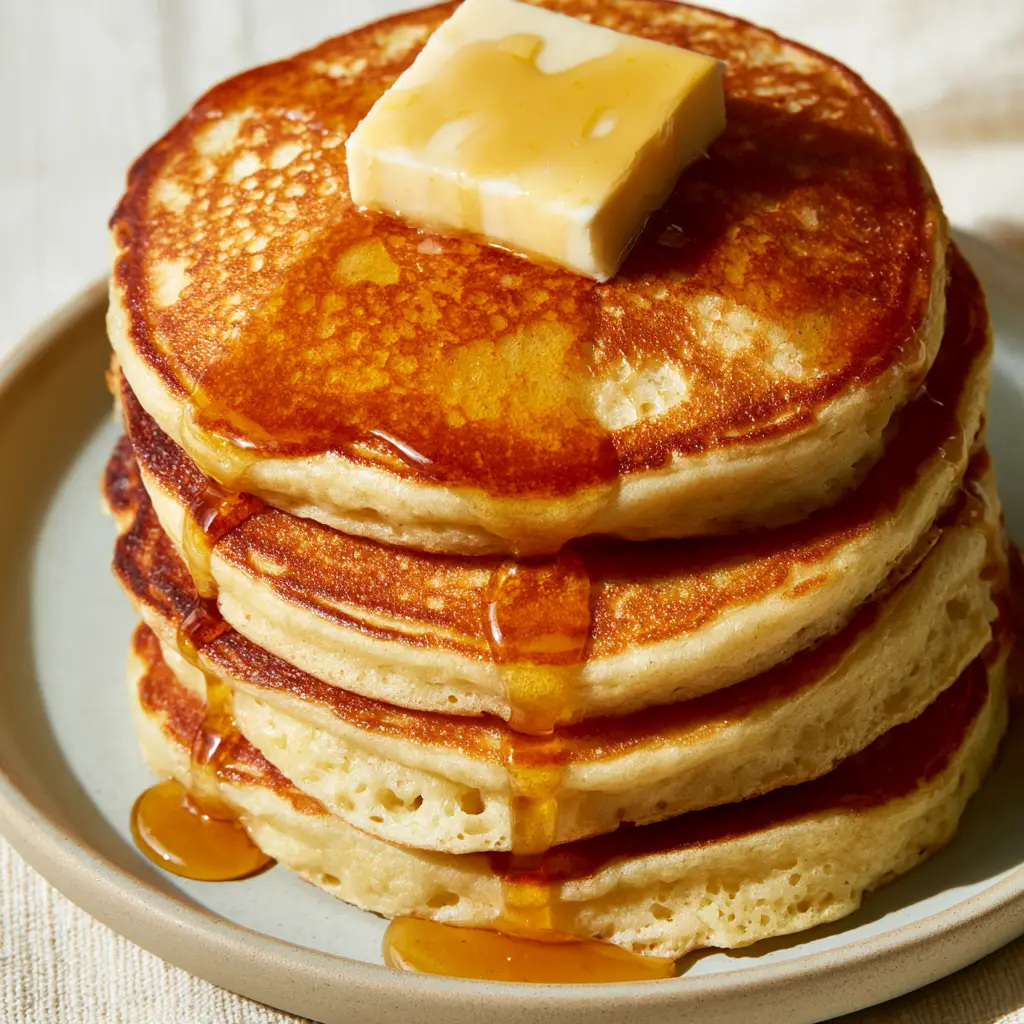
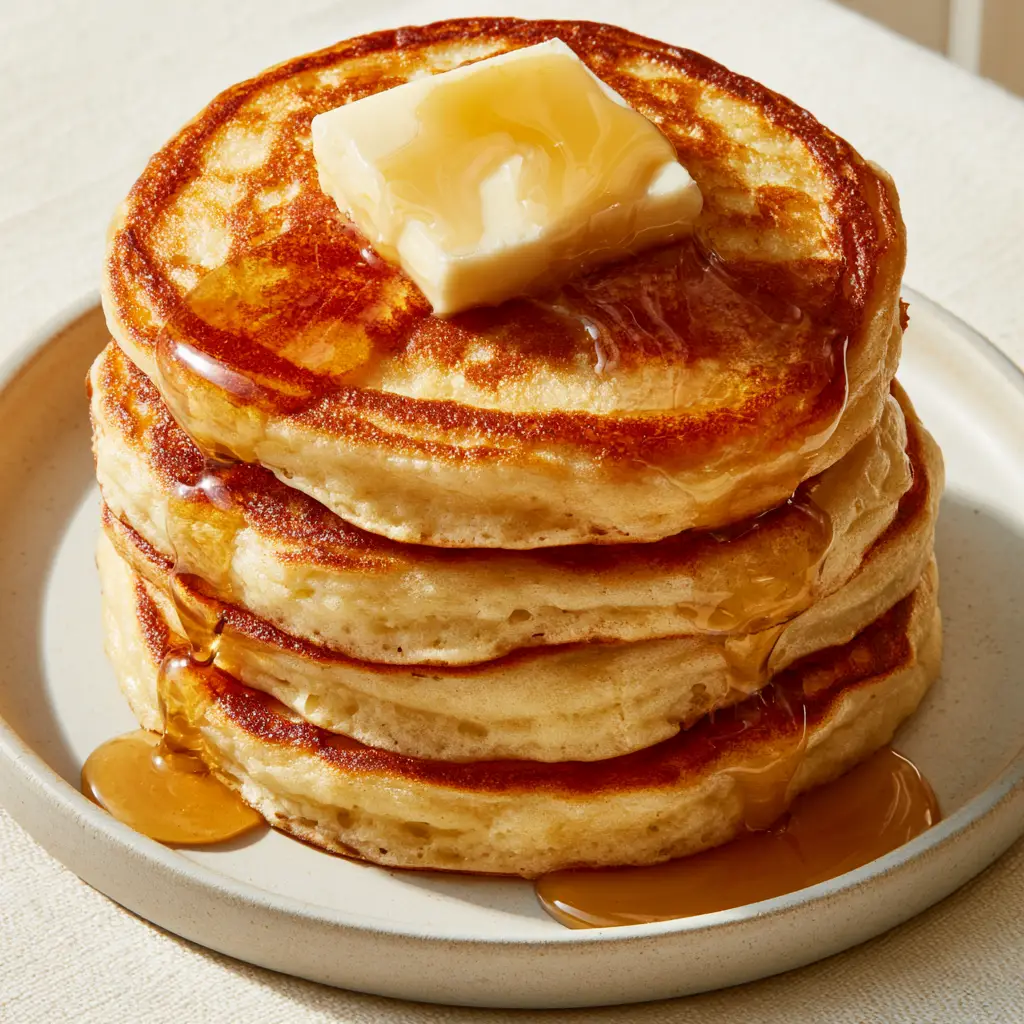
American pancakes are the crown jewel of the weekend breakfast table. There is nothing quite like a towering stack of four 1-inch thick buttermilk pancakes featuring a perfect golden-brown seared surface and aerated pillowy sides. If you have been searching for that iconic diner-style texture—thick, soft, and capable of soaking up viscous amber maple syrup—you have arrived at the right place. This recipe is engineered for maximum height and a delicate, lacy edge that shatters slightly under your fork.
When you see that large, thick square pat of premium salted butter begin to melt into golden rivulets down the side of a warm stack, you know the morning is off to a perfect start. These american pancakes aren’t just food; they are a sensory experience, from the soft natural morning light hitting the plate to the gentle aroma of toasted flour and vanilla. Whether you are a seasoned pro or a breakfast beginner, this guide will show you exactly how to achieve that extreme macro-level texture every single time.
Why These Are the Best American Pancakes You Will Ever Make
- Extreme Leavening: We use a specific ratio of baking powder and baking soda to achieve ultra-thick one-inch diner-style heights.
- Golden Sear: Our cooking technique ensures a perfect golden-brown circular sear with crispy, lacy edges.
- Aerated Crumb: The interior is filled with visible airy, porous side textures that act like a sponge for syrup.
- Culinary Logic: We balance acidity and fat to ensure a tender, melt-in-your-mouth feel that isn’t gummy.
If you love these, you might also want to try our Butter Pecan Pancakes (coming soon) for a nutty twist, or explore our lighter Apple Yogurt Pancakes for a fruity start to the day. For those who prefer a different shape entirely, these Mini German Pancakes are always a crowd-pleaser.
The Essential Ingredients for Massive Rise
To get that towering stack, every ingredient serves a technical purpose. Here is what you will need for these american pancakes:
The Dry Components
All-Purpose Flour: 2 cups (250g). This provides the structure. Do not overwork it, or your american pancakes will become tough rather than pillowy.
Granulated Sugar: 2 tablespoons (25g). This isn’t just for sweetness; it aids in the caramelization that creates the golden-brown seared surface.
Baking Powder: 2 teaspoons (10g). The primary lifting agent for that 1-inch thickness.
Baking Soda: 1 teaspoon (5g). This reacts with the buttermilk for immediate aeration and helps with browning.
Fine Sea Salt: ½ teaspoon (3g). Essential to balance the sweetness and enhance the buttery flavor profile.
The Wet Components
Full-Fat Buttermilk: 2 cups (480ml). The acidity tenderizes the gluten and provides the classic “tang.” If you want authentic american pancakes, do not skip the real buttermilk.
Large Eggs: 2 units. These provide protein structure to hold the air bubbles in place while cooking.
Unsalted Butter (Melted): 4 tablespoons (56g). Provides richness and a moist crumb. We will top the final dish with salted butter for that savory-sweet contrast.
Vanilla Extract: 1 teaspoon (5ml). For that nostalgic, bakery-style aroma.
Step-By-Step: Mastering the 1-Inch Thick Stack
Step 1: The Gentle Mix
In a large bowl, whisk together your dry ingredients. In a separate jug, whisk the buttermilk, eggs, melted butter, and vanilla. Create a well in the center of the dry ingredients and pour in the wet. Gently fold with a spatula. Stop as soon as no large streaks of flour remain. Lumps are your friend; they ensure the american pancakes stay light and porous.
Step 2: The Critical Rest
Allow the batter to sit for at least 10 minutes. This allows the flour to hydrate and the baking soda to react with the buttermilk. You will see small bubbles forming on the surface—this is the “lift” that creates those visible airy, porous side textures.
Step 3: Preparing the Seared Surface
Heat a non-stick griddle or heavy cast-iron skillet over medium heat. Lightly brush with a tiny amount of neutral oil or butter. You want the surface hot enough that a drop of water sizzles and disappears instantly. This heat is what creates the perfect golden-brown circular sear and those delicate lacy crispy edges.
Step 4: The Pour and the Rise
Use a ½ cup (120ml) measure to scoop the batter onto the griddle. Do not spread the batter. Let it sit in a thick, high circle. As it cooks, you will see the american pancakes begin to grow vertically. Wait for bubbles to form and pop on the top surface, and for the edges to look set and matte.
Step 5: The Flip
Slide a thin spatula under the pancake and flip in one swift motion. The cooked side should show a deep amber sear. Cook for another 1-2 minutes until the sides are opaque and the center feels springy. Repeat until you have a towering stack of four.
Expert Tips for Pancake Perfection
- Check Your Leaveners: If your baking powder is older than 6 months, your american pancakes will not reach that 1-inch thickness.
- Temperature Control: If the outside is burnt but the inside is raw, your heat is too high. Aim for a “low and slow” approach once the initial sear is established.
- Don’t Press: Never press down on the pancake with your spatula. This collapses the aerated pillowy sides you worked so hard to create.
- Wipe the Pan: Between batches, wipe the skillet to prevent burnt butter bits from ruining the matte ceramic plate presentation.
For more breakfast inspiration, check out our Ultimate Pancake Guide or grab a batch of Sweet Potato Breakfast Cookies for busy mornings.
Storage, Reheating & Freezing
To Store: Keep leftover american pancakes in an airtight container in the refrigerator for up to 3 days.
To Freeze: Place a piece of parchment paper between each pancake and store in a freezer-safe bag for up to 2 months. This prevents them from sticking together in a giant block.
To Reheat: For the best texture, use a toaster or a 350°F (175°C) oven until warmed through. Avoid the microwave if you want to keep those crispy edges.
What to Serve With American Pancakes
While a large, thick square pat of premium salted butter and viscous amber maple syrup are the gold standard, you can elevate this meal further. Serve with crispy bacon or breakfast sausage for a salty contrast. If you are doing a full brunch spread, consider adding some Chia Pudding or a side of Raspberry Pastry Twists (coming soon).
Frequently Asked Questions
It is best to cook the batter within 30 minutes. Because the baking soda reacts immediately with the buttermilk, the bubbles will eventually deflate if the batter sits too long, resulting in flatter pancakes.
Yes, but the texture will change. To mimic buttermilk, add 1 tablespoon of lemon juice or vinegar to 1 cup of milk and let it sit for 5 minutes. This acidity is required to react with the baking soda for a high rise.
Start with a medium heat and a very light coating of oil. Do not over-grease the pan, as this leads to uneven browning. A heavy-bottomed skillet or cast iron helps distribute heat evenly for that circular sear.
The most common reasons are overmixing the batter, which develops too much gluten, or using expired baking powder. Ensure you leave lumps in the batter and let it rest for 10 minutes before cooking.
The first pancake is usually a ‘test’ for pan temperature and oil distribution. Once the pan is evenly heated and the excess oil is absorbed, the subsequent pancakes will have that perfect diner-style appearance.
The Ultimate Fluffy American Pancake Recipe
American Pancakes: The Ultimate Thick and Fluffy Buttermilk Recipe
Ingredients
Equipment
Method
- In a large bowl, whisk flour, sugar, baking powder, baking soda, and salt until combined.
- In a separate jug, whisk buttermilk, eggs, melted butter, and vanilla.
- Pour wet ingredients into the dry. Fold gently until just combined; lumps are expected. Let rest for 10 minutes.
- Heat a griddle over medium heat. Lightly grease with oil.
- Pour 1/2 cup of batter per pancake. Do not flatten. Wait for bubbles to form on top and edges to set.
- Flip carefully and cook until the second side is golden-brown and the center is cooked through.
Notes
Use a medium heat to ensure the golden sear doesn't burn before the middle is set.
Join the Savory Vale Community!
Did your stack reach the full 1-inch height? We want to see! Save this recipe to your Pinterest Breakfast Board so you never lose it. If you made these american pancakes, please leave a 5-star rating in the recipe card above and upload a photo of your stack in the comments below. Following @savory_vale ensures you never miss a fluffy, golden-brown update!