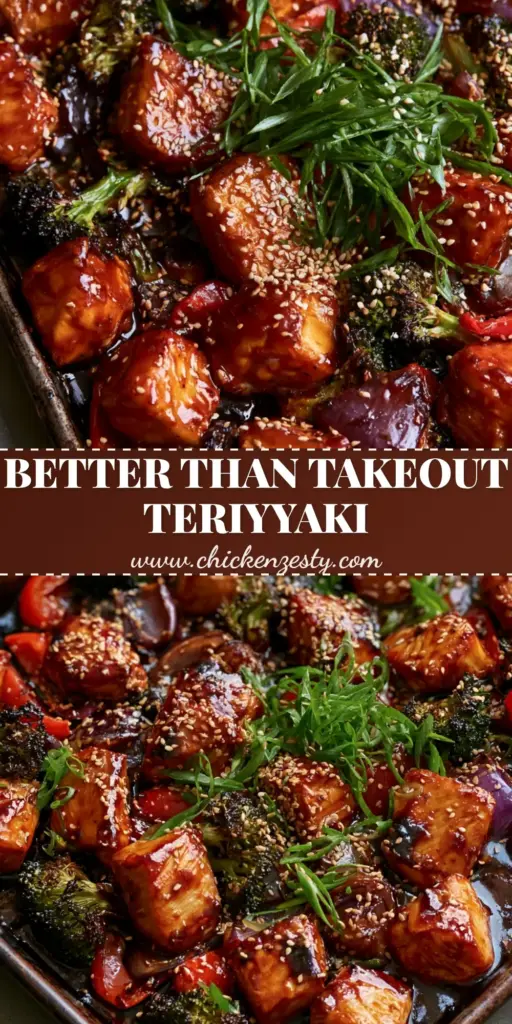
This Teriyaki Chicken recipe is about to become your new weeknight obsession. Imagine juicy, seared chicken breast cubes smothered in a thick mahogany teriyaki glaze that literally bubbles with flavor, paired perfectly with charred broccoli and sweet roasted peppers. Whether you are looking for a quick meal prep solution or a family-friendly dinner, this vibrant sheet pan meal delivers high-protein nutrition with a restaurant-quality finish that validates every Pinterest craving.
If you have been searching for an easy chicken breast recipe that actually tastes like it came from a professional kitchen, you are in the right place. We are skipping the watery bottled sauces and creating a sticky, glossy coating that clings to every single bite. Let’s dive into how to achieve that perfect sear and that iconic teriyaki chicken glow.
Why You Will Crave This Sheet Pan Teriyaki Chicken
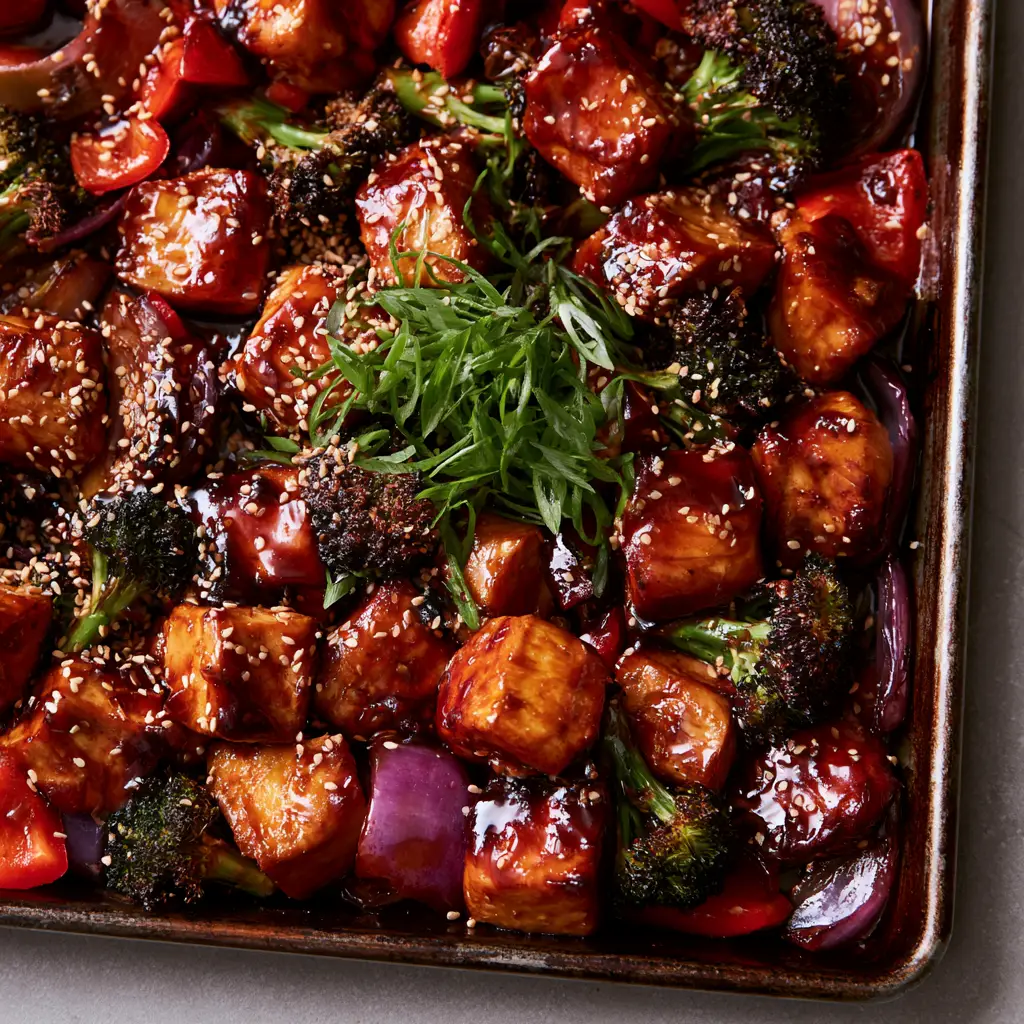
- The Mahogany Glaze: A homemade sauce that reduces into a thick, glossy syrup with visible bubbles, far superior to anything store-bought.
- Perfectly Charred Textures: We use high-heat roasting to ensure the broccoli florets get those crispy, dark edges while the red peppers stay tender-crisp.
- Visual Vibrancy: The contrast between the purple onion wedges, bright green scallions, and deep mahogany chicken makes this a feast for the eyes.
- One-Pan Cleanup: Everything happens on a single rustic metal sheet pan, making your post-dinner cleanup a breeze.
- Versatile Pairing: It tastes incredible on its own, but you can easily serve it over teriyaki noodles for a more filling meal.
The Anatomy of the Perfect Teriyaki Chicken Glaze
The secret to world-class Teriyaki Chicken lies in the viscosity of the sauce. A professional glaze shouldn’t just run off the meat; it should coat the chicken like a second skin. By using a combination of soy sauce, ginger, and a touch of cornstarch, we create a thick mahogany teriyaki glaze that caramelizes in the oven.
If you enjoy this flavor profile, you might also love our ground turkey teriyaki bowls for a different protein twist. The key is the balance of salt, sugar, and aromatics. We use fresh garlic and ginger to provide a punchy foundation that cuts through the sweetness of the honey.
Essential Ingredients for Success
The Protein and Produce
1.5 lbs (680g) Chicken Breast: We use boneless, skinless breasts cut into uniform 1-inch cubes. This ensures they sear quickly without drying out. For a different texture, you could try this method with parmesan crusted chicken techniques, but for today, we are keeping it classic and glossy.
3 cups (approx. 250g) Broccoli Florets: Cut these into bite-sized pieces. The small crevices are perfect for catching the extra glaze.
2 large Red Bell Peppers: Sliced into strips. These add a necessary sweetness and a pop of color to the Teriyaki Chicken palette.
1 large Purple Onion: Cut into thick wedges. When roasted, these soften and become incredibly sweet, providing a mellow earthy flavor.
The Signature Teriyaki Glaze
1/2 cup (120ml) Soy Sauce: The salty, umami base of our sauce. Use low-sodium if you are sensitive to salt.
1/4 cup (60ml) Honey or Brown Sugar: This provides the sweetness and the sugar content needed for that glossy mahogany finish.
1 tbsp (15ml) Rice Vinegar: Adds a hit of acidity to brighten the entire dish.
1 tsp (5g) Fresh Grated Ginger: Provides a subtle heat and signature Asian-inspired aroma.
2 cloves Garlic, minced: Essential for a savory depth of flavor.
1 tsp (5ml) Toasted Sesame Oil: A little goes a long way for that nutty, toasted finish.
1 tbsp (8g) Cornstarch: The thickening agent that turns juice into a glaze.
Step-by-Step: Mastering the Teriyaki Sear
Phase 1: The Glaze Reduction
In a small saucepan over medium heat, whisk together the soy sauce, honey, rice vinegar, ginger, garlic, and sesame oil. In a tiny bowl, mix the cornstarch with 1 tablespoon of cold water to create a slurry. Whisk this into the saucepan.
Simmer the sauce for 3-5 minutes until it thickens into a thick mahogany glaze. It should easily coat the back of a spoon. Set aside half of the sauce for drizzling later.
Phase 2: Prepping the Sheet Pan
Preheat your oven to 425°F (220°C). A high temperature is non-negotiable for achieving charred broccoli florets and seared chicken breast cubes. Toss the broccoli, red pepper strips, and purple onion wedges with a light coating of neutral oil and a pinch of salt.
Phase 3: The High-Heat Roast
Arrange the vegetables on one side of a large, dark metal sheet pan. On the other side, place the chicken cubes. Pour half of the teriyaki glaze over the chicken, tossing to coat thoroughly. Pro Tip: Ensure the chicken is in a single layer to allow for proper searing rather than steaming.
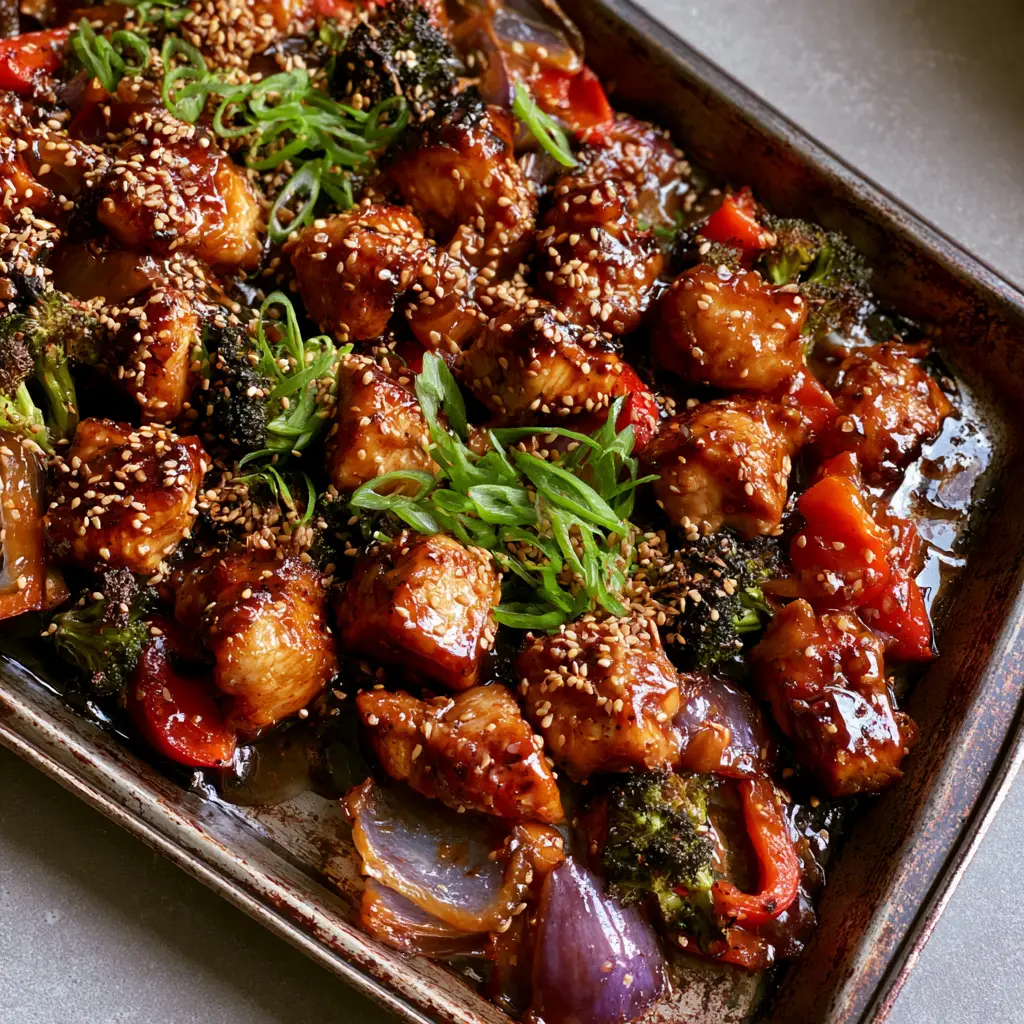
Roast for 15-18 minutes. You are looking for the glaze to start bubbling from the oven heat and the chicken to reach an internal temperature of 165°F (74°C). The broccoli should have visible dark, charred edges.
Phase 4: The Final Garnish
Remove the pan from the oven. Drizzle the remaining glaze over the chicken and vegetables while everything is still screaming hot. This creates a double-layer of flavor. Immediately sprinkle with a generous dusting of toasted white sesame seeds and a spray of thinly sliced bright green scallions.
Expert Tips for the Best Teriyaki Chicken
- Don’t Overcrowd the Pan: If the chicken cubes are touching, they will release moisture and steam. For the best Teriyaki Chicken, give each piece space to breathe.
- Fresh vs. Bottled Ginger: Fresh ginger makes a massive difference in the vibrancy of the glaze. If you must use powder, use only 1/4 teaspoon.
- The Metal Matters: A dark metal sheet pan absorbs more heat than a light aluminum one, which helps in achieving those charred broccoli edges faster.
- Check the Internal Temp: Chicken breast can dry out quickly. Use a meat thermometer to pull the pan the moment the chicken hits 165°F (74°C).
Storage, Reheating, and Freezing
To Store: Keep leftovers in an airtight container in the refrigerator for up to 4 days. The flavors actually deepen as the Teriyaki Chicken sits.
To Reheat: For best results, reheat in a skillet over medium heat with a splash of water to loosen the glaze. Alternatively, microwave in 30-second intervals until warmed through.
To Freeze: This dish is excellent for freezing. Store in freezer-safe bags for up to 3 months. Thaw overnight in the fridge before reheating.
What to Serve with Your Sheet Pan Dinner
While this is a complete meal on its own, you can expand the feast. It pairs beautifully with steamed jasmine rice or a side of veggie-heavy skillet sides. For a low-carb option, serve it over cauliflower rice or alongside a crisp cucumber salad.
The Ultimate Teriyaki Chicken Recipe Card
Teriyaki Chicken Sheet Pan Dinner with Charred Broccoli and Peppers
Ingredients
Equipment
Method
- Whisk soy sauce, honey, vinegar, ginger, garlic, and cornstarch slurry in a saucepan. Simmer until a thick mahogany glaze forms.
- Toss chicken and vegetables on the sheet pan with half the glaze. Arrange chicken in a single layer for a better sear.
- Roast at 425°F (220°C) for 15-18 minutes until the sauce is bubbling and the broccoli is charred.
- Drizzle with remaining glaze and top with toasted sesame seeds and sliced green scallions.
Notes
Use a dark sheet pan for superior vegetable charring.
Yes! Chicken thighs are more forgiving and stay juicy at high temperatures. Just ensure you cut them into uniform cubes and adjust the roasting time by an extra 2-3 minutes if needed.
The key is the cornstarch slurry and proper reduction. Whisk 1 tbsp of cornstarch with 1 tbsp of cold water, add it to your simmering sauce, and let it cook until it coats the back of a spoon.
To make this recipe gluten-free, simply swap the soy sauce for Tamari or coconut aminos. The cornstarch naturally provides a gluten-free thickening agent for the glaze.
Mushy vegetables usually result from overcrowding the pan or a low oven temperature. Ensure your oven is at 425°F (220°C) and the broccoli florets are spread out in a single layer.
Save This Recipe to Pinterest!
Do you love easy, high-flavor dinners? Make sure to save this Teriyaki Chicken to your favorite Pinterest board by clicking the Pin button! Following savory_vale ensures you never miss a vibrant sheet pan meal. If you make this, please share a photo in the comments below and leave a 5-star rating—it helps other home cooks find this delicious recipe!