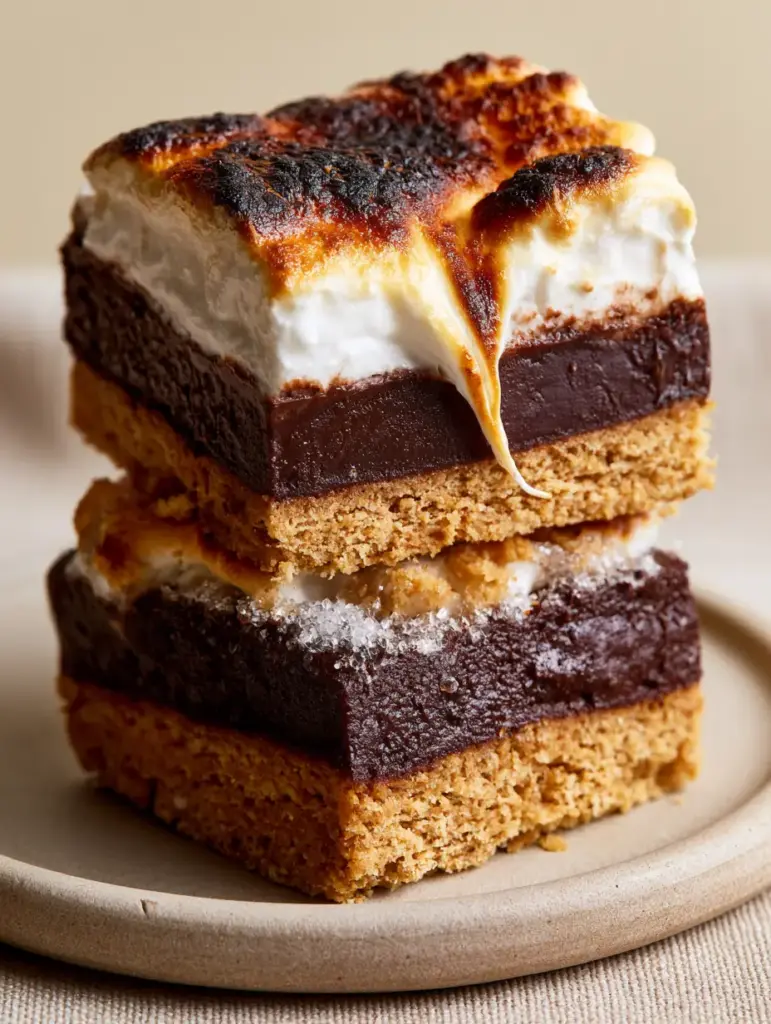
S’more Bars are the ultimate nostalgic treat, but these aren’t your average childhood campfire snacks. This recipe elevates the classic combination of graham, chocolate, and marshmallow into a gourmet, no-bake masterpiece that looks like it stepped out of a high-end pastry shop. Imagine a thick, buttery crust topped with a glossy, half-inch layer of rich dark chocolate, finished with voluminous clouds of toasted marshmallow fluff.
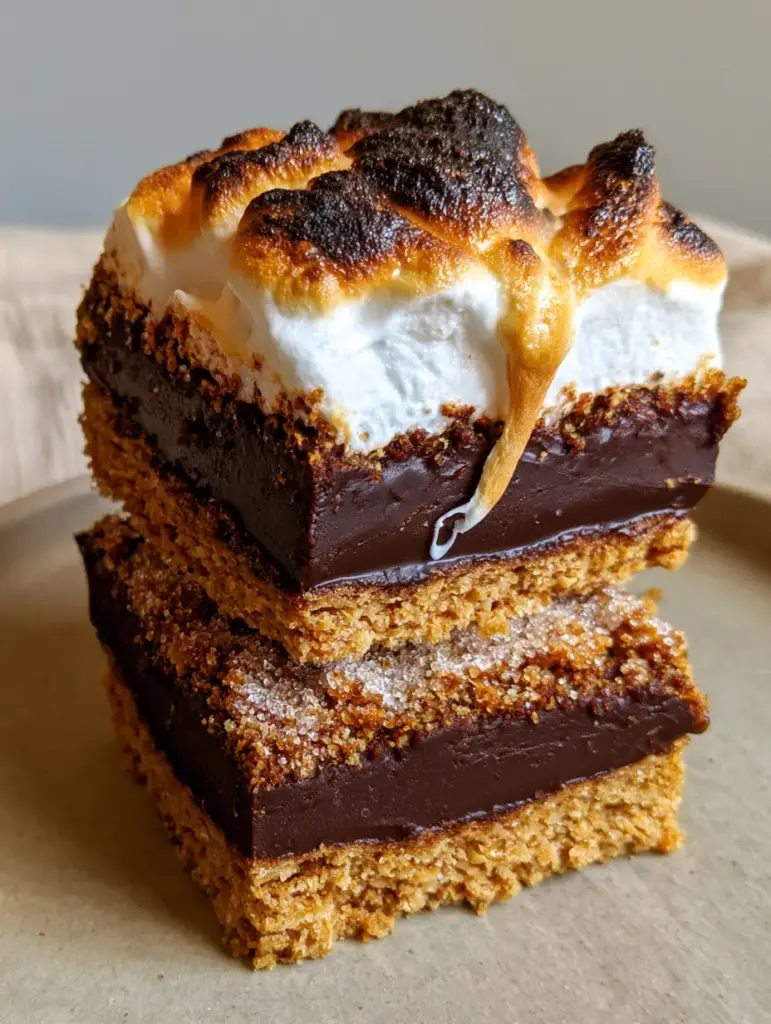
The visual appeal of these S’more Bars is defined by the dramatic contrast between the amber-to-espresso charred peaks of the marshmallow and the crystalline shimmer of sea salt flakes. Bathed in a soft morning side-light, the golden honey drizzle catches the glow, highlighting the “stretch” of the marshmallow and the clean, sharp side cuts of the ganache. Whether you are hosting a summer soirée or looking for a sophisticated weekend project, this recipe delivers professional results with zero oven time.
Creating this level of culinary architecture requires attention to detail, specifically in the setting of the ganache and the precision of the kitchen torch. We have designed this guide to help you master the “clean cut” and the “perfect toast,” ensuring your bars look exactly like the high-resolution macro photography seen in gourmet dessert blogs. Prepare to impress with a dessert that balances deep cocoa bitterness with airy, honey-kissed sweetness.
Why This Gourmet S’more Bars Recipe Redefines No-Bake Desserts
- Structural Integrity: A compressed, golden-brown graham cracker crust provides a sturdy foundation that doesn’t crumble upon the first bite.
- Decadent Dimensions: A precise 0.5-inch (1.27cm) dark chocolate ganache layer offers a silky, glossy mouthfeel that far surpasses standard chocolate bars.
- Visual Drama: The toasted marshmallow fluff features a gradient of color, from snowy white to amber to dark espresso brown, achieved through targeted heat.
- The Flavor Bridge: Tiny sea salt flakes and a golden honey drizzle cut through the sugar, creating a complex flavor profile that appeals to adult palates.
- No-Bake Ease: Achieve bakery-quality aesthetics without ever turning on your oven, making this perfect for hot summer days.
The Ultimate Visual Texture Guide for Homemade S’mores
When we talk about the perfect S’more Bars, we are looking for a specific interplay of light and texture. The crust should show visible buttery crumbs, indicating a high-fat content that ensures a “short” and snappy texture rather than a hard, rock-like base. This is the same principle we use when building the foundations for our zesty lemon-raspberry bars.
The ganache must be glossy, which indicates a successful emulsion between the fats in the heavy cream and the cocoa solids in the chocolate. If the ganache is dull, it usually means the temperature was too high or the ratio was off. For these S’more Bars, we aim for a 1:1 ratio by weight to ensure it is firm enough to slice but soft enough to melt on the tongue.
The marshmallow topping is the “crown” of this dessert. Unlike standard marshmallows, which can be rubbery, marshmallow fluff provides a voluminous, cloud-like appearance. By using a kitchen torch, we create “charred espresso brown peaks” that provide a hint of smoky bitterness, mimicking the authentic campfire experience. This technique is similar to how we finish the tops of our decadent deep-fried marshmallows.
Everything You Need for This Decadent Layered Dessert
Graham Cracker Crumbs: 3 cups (300g) of finely crushed crackers. These provide the essential honey-wheat flavor and the structural base for our S’more Bars.
Unsalted Butter: 3/4 cup (170g) melted. This acts as the “glue” for your crust; high-quality European butter adds a richer flavor to the crumbs.
Granulated Sugar: 1/4 cup (50g). This helps slightly caramelize the crust as it sets, giving it that “golden-brown” visual appeal.
Dark Chocolate (60-70% Cocoa): 16 oz (450g) finely chopped. High-quality couverture chocolate ensures a glossy finish and a deep, sophisticated flavor profile.
Heavy Whipping Cream: 1.5 cups (360ml). This provides the liquid base for our ganache, creating that signature 0.5-inch (1.27cm) thick layer.
Marshmallow Fluff: 15 oz (425g). This is the key to the “voluminous” peaks that look better than standard melted marshmallows.
Maldon Sea Salt Flakes: 1 tsp (5g). These crystalline sugar-like flakes provide the visual contrast and flavor balance against the dark chocolate.
Golden Honey: 2 tbsp (30ml). A thin trail of honey adds a glossy highlight and a floral sweetness to the final presentation.
Essential Kitchen Tools for That Professional Charred Finish
To achieve the “sharp side cut” seen in our macro photography, you will need an 8×8 inch (20x20cm) square baking pan lined with parchment paper. Leave an overhang of parchment on the sides; this “sling” allows you to lift the entire block of S’more Bars out of the pan for precise slicing without damaging the crust.
A kitchen torch (butane torch) is non-negotiable for the espresso-brown peaks. While an oven broiler can toast marshmallows, it provides a flat, even heat that doesn’t create the dramatic “amber to dark charred” gradient we want. The torch allows for “culinary forensics”—spot-treating individual peaks of fluff to create visual depth.
Finally, a heavy-duty offset spatula is your best friend for smoothing the ganache layer. To get that perfectly flat, half-inch glossy finish, you need to spread the chocolate in one smooth motion. This tool is a staple in our kitchen, whether we are making these bars or our creamy blueberry dessert bars.
Step-by-Step Architecture for Perfect Chocolate Layers
Constructing the Compressed Graham Foundation
In a medium bowl, combine the 3 cups (300g) of graham cracker crumbs with the sugar and melted butter. Stir until the mixture resembles wet sand and holds its shape when squeezed in your hand. This sensory cue is vital for a crust that doesn’t fall apart.
Transfer the mixture to your lined 8×8 pan. Use the bottom of a flat measuring cup to press the crumbs down firmly. You are aiming for a “thick, compressed golden-brown graham cracker crust.” Chill this in the freezer for 15 minutes to lock the fats in place before adding the warm ganache.
The Science of the Glossy Dark Chocolate Ganache
Place your finely chopped dark chocolate in a heat-proof glass bowl. In a small saucepan, bring the heavy cream to a gentle simmer (do not boil). Look for small bubbles forming around the edges of the pan—this is the “scald” point (approx. 180°F / 82°C).
Pour the hot cream over the chocolate and let it sit undisturbed for 5 minutes. This allows the chocolate to melt gently without seizing. Slowly whisk from the center outward until a glossy, deep-brown emulsion forms. Pour this over your chilled crust, ensuring it reaches exactly half an inch (1.27cm) in thickness. Refrigerate for at least 4 hours, or until the chocolate is firm to the touch.
The Pro Secret to Those Dramatic Toasted Marshmallow Peaks
Applying the Voluminous Fluff Layer
Once the ganache is fully set and cold, spoon the marshmallow fluff over the top. Use the back of a spoon to create “swirls and peaks.” Pull the spoon upward quickly to create the “stretchy” texture described in our visual prompt. Do not smooth it flat; the beauty of S’more Bars lies in the chaotic, voluminous mountain of marshmallow.
Mastering the Kitchen Torch Technique
Hold your kitchen torch about 3 inches (7.5cm) away from the fluff. Move the flame in a circular motion, focusing on the very tips of the peaks. You want to see a gradient: the base should stay white, the middle should turn amber, and the very tips should reach a dark, charred espresso brown. This provides the smoky flavor that defines a true s’more.
How to Achieve Clean, Bakery-Style Cuts Every Single Time
The “clean, sharp side cut” is the hallmark of an elite food blogger. To achieve this with S’more Bars, you must slice the bars while they are very cold. Use a long, sharp chef’s knife. Run the blade under hot water for 30 seconds, then wipe it completely dry.
Press the hot blade straight down through the fluff, ganache, and crust in one firm motion. Do not “saw” back and forth, as this will smudge the chocolate into the crust. Clean the knife and reheat it under hot water after every single cut. This ensures the 0.5-inch ganache layer remains distinct and glossy on the sides.
Once sliced, sprinkle the tiny sea salt flakes over the top. The salt will stick to the slightly warmed marshmallow peaks. Finally, use a spoon to drizzle the golden honey in a thin, erratic trail across the stack. This adds the final “morning side-light” highlight that makes the dessert pop.
Maintaining the Perfect Crunch: Storage and Prep Advice
Because these S’more Bars are a no-bake dessert, they are sensitive to temperature. Store them in an airtight container in the refrigerator for up to 5 days. However, for the best texture, the marshmallow fluff is best consumed within 24 hours of torching, as it can start to “weep” or lose its volume over time.
If you need to make these in advance for a party, prepare the crust and the ganache layer up to 2 days ahead. Wait to add the fluff, torch it, and drizzle the honey until the day of serving. This ensures the graham cracker crust remains crunchy and doesn’t absorb moisture from the marshmallow.
We do not recommend freezing these bars once the fluff has been added. The freezing and thawing process ruins the delicate structure of the marshmallow peaks. However, the crust and ganache base can be frozen for up to a month if wrapped tightly in plastic wrap and foil.
Creative Serving Suggestions and Perfect Pairings
S’more Bars are a rich, heavy dessert, so they pair beautifully with light, acidic components. Serve these alongside a refreshing chicken caesar pasta salad for a balanced summer lunch menu. The saltiness of the salad provides a great counterpoint to the deep chocolate.
If you are planning a full-course meal, these bars fit perfectly into a lineup of outdoor summer dinner recipes. They offer the flavor of a campfire without the need for an actual fire pit, making them ideal for urban entertaining or patio parties.
For a textural contrast on your dessert table, consider serving these alongside our chewy chocolate chip oatmeal cookie bars. The oats provide a rustic, hearty texture that complements the silky smoothness of the ganache and fluff. A cold glass of milk or a bitter espresso is the traditional—and best—beverage pairing.
Frequently Asked Questions
While a torch provides the best ‘charred espresso’ peaks, you can use a broiler for 30-60 seconds. However, watch it very closely, as fluff burns much faster than standard marshmallows and won’t have the same pointed peak definition.
You can, but the visual result will differ. Standard marshmallows melt into a flat layer, whereas fluff allows you to create the voluminous, tall peaks and ‘stretchy’ texture seen in professional food photography.
Glossiness comes from a perfect emulsion. Ensure you finely chop the chocolate so it melts evenly, and avoid over-whisking, which can introduce air bubbles and dull the finish. Using high-quality chocolate with extra cocoa butter also helps.
S’more Bars stay fresh in the refrigerator for up to 5 days. For the best visual appeal and texture, we recommend torching the marshmallow topping on the day you plan to serve them.
A crumbling crust usually means it wasn’t pressed firmly enough or there wasn’t enough melted butter to bind the crumbs. Use the bottom of a heavy glass or measuring cup to pack the crumbs into a solid, compressed layer before chilling.
The Ultimate Gourmet No-Bake S’more Bars Recipe
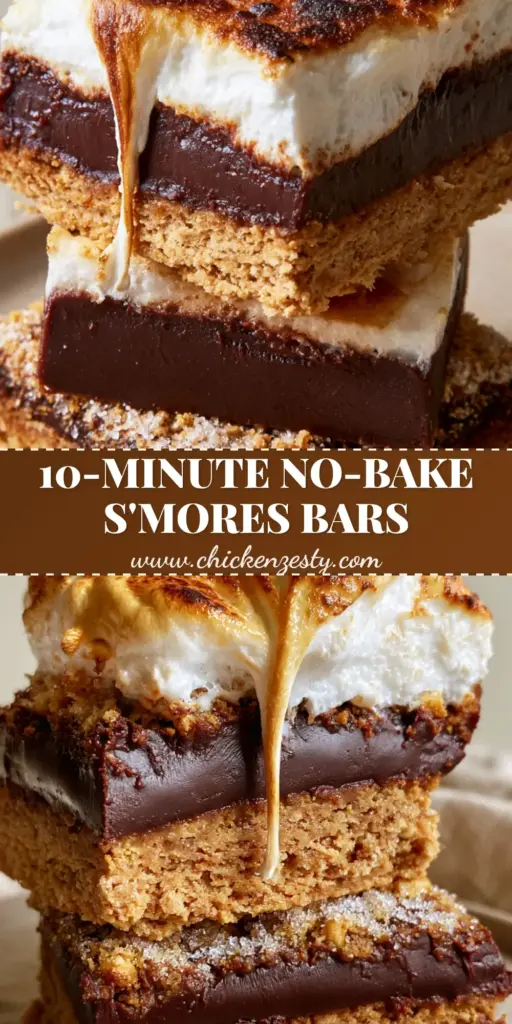
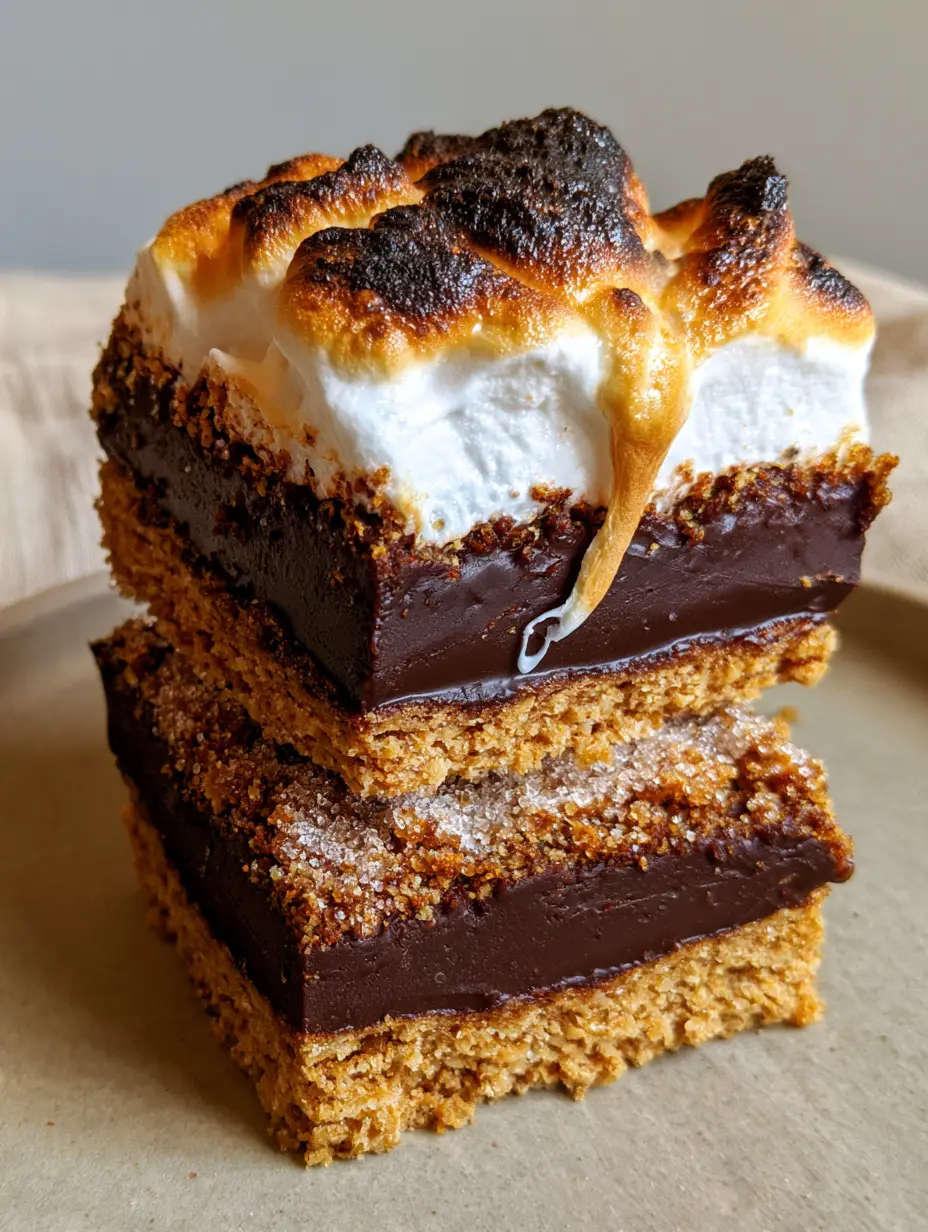
S'more Bars with Toasted Marshmallow Fluff and Dark Chocolate Ganache
Ingredients
Equipment
Method
- In a medium bowl, combine graham cracker crumbs, sugar, and melted butter until the mixture looks like wet sand.
- Press firmly into a lined 8x8 pan using a flat-bottomed cup. Freeze for 15 minutes to set.
- Bring heavy cream to a simmer in a saucepan. Do not let it reach a rolling boil.
- Pour hot cream over chopped chocolate. Wait 5 minutes, then whisk until glossy and smooth.
- Pour over the crust to a 0.5-inch thickness. Refrigerate for at least 4 hours until firm.
- Spread marshmallow fluff over the set chocolate, creating high peaks with a spoon.
- Use a kitchen torch to brown the peaks until they range from amber to charred espresso brown.
- Sprinkle with sea salt and drizzle with honey before slicing with a hot, clean knife.
Notes
Toast the marshmallow fluff right before serving for maximum volume.
Conclusion: Elevate Your Dessert Game with S’more Bars
These S’more Bars represent the pinnacle of no-bake dessert design. By combining a scientifically-sound ganache with artisanal torching techniques, you create a treat that is as visually stunning as it is delicious. The contrast of the charred espresso peaks against the glossy dark chocolate and the buttery graham crust ensures every bite is a multi-sensory experience.
We invite you to share your creations! Did you achieve those perfect marshmallow stretches? Tag us on social media and follow our Pinterest for more gourmet inspiration. Don’t forget to leave a comment below with your favorite s’mores memories or any tips you discovered while torching your fluff!